It’s easy to do your own thing when it comes makeup, but if you want to know how to apply makeup like a pro, then this post is for you! Take note that while professional makeup artistry calls for creativity and thinking outside the box, there are many times that I find myself actually coloring inside the lines (so to speak) to create looks that certain situations call for, like a party, an everyday work-appropriate look, or a wedding. Here are some basic makeup tutorials I swear by.
How to Apply Makeup Like a Pro Step by Step
In this article:
- How to Apply Makeup Like a Pro: Foundation and Concealer
- How to Apply Makeup Like a Pro: Blush
- How to Apply Makeup Like a Pro: Contouring
- How to Apply Makeup Like a Pro: Liquid Lipstick
- How to Apply Eye Makeup Like a Professional
1. How to Apply Makeup Like a Pro: Foundation and Concealer
There a lot of different ways to apply makeup– some people go full coverage and really detailed and drawn on, and some like to go a little easier, showing a more natural finish. In the professional makeup artist’s world, application depends on what is necessary. Today, I’m going to give you some tips and tutorials on how to apply makeup for a beauty concept, which is what most of us do anyway.
I mentioned beauty concept because there are different looks that we can all go for, like avant-garde, theatrical, high fashion, among others. But I think so far, what most of us want to master is to create a flawless beauty look for day or night.
Foundation

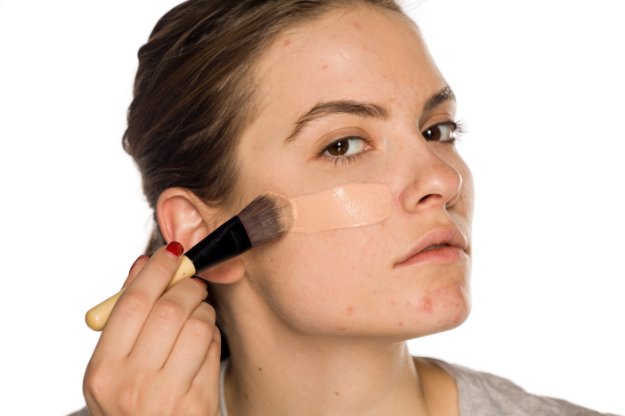
Contrary to popular belief, foundation does not need to be full coverage all the time. It only needs to cover certain areas like redness, pimple spots, and the like. The important thing to note is color matching and even application. A natural-looking foundation starts with good skin care and applying less on the face. Blending it out evenly also helps to create a flawless finish.
This video by professional makeup artist Mathias Alan shows you how to apply makeup like a pro:
Concealer
This makeup application is often forgotten when doing everyday makeup, but you should know that this is one of the most important things to do if you want to look fresh. Creasing is the number one enemy of undereye concealing.
I struggled with this problem for a long time, but really the trick is simple: Apply a thin layer of your favorite undereye concealer (mine is Nars Radiant Creamy Concealer). If you find it lacking, then add another thin layer.
Don’t pile it on all at once, because this will cause your concealer to crease and cake. One or two layers of concealer will do. After that, you have to set it with a setting powder (I use RCMA No Color Powder). That’s it; you’re good to go!
Oh, and if you’ve seen those tutorials where they apply undereye concealer in an inverted triangle position, it’s worth copying. It creates an illusion of lift and it brightens the center of your face.
2. How to Apply Makeup Like a Pro: Blush

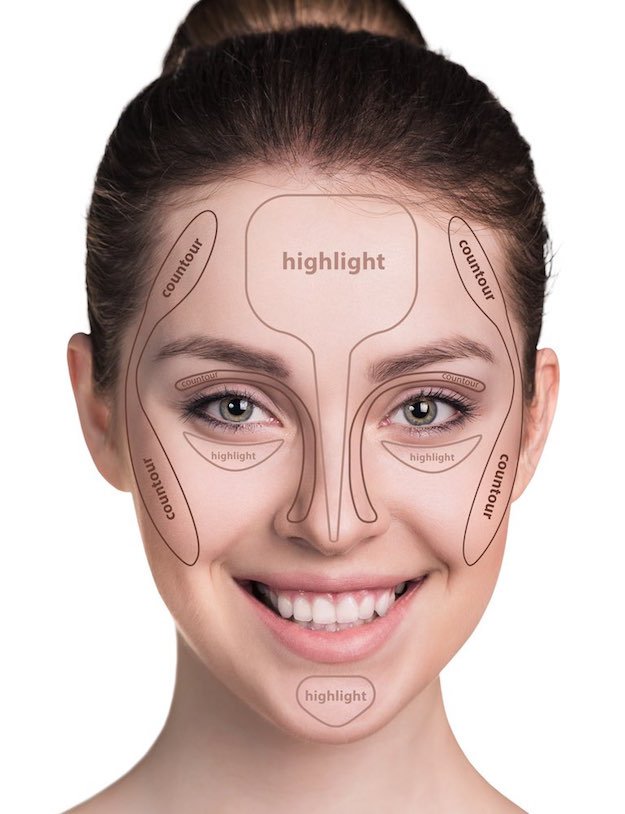
I can forego anything except blush. On days when I’m in a hurry, I never step out of the house without cheek tint. Blush immediately gives your face a healthy-looking radiance, taking away the dullness of the skin. So it’s important to know how to put blush on your face shape. Depending on how you apply it, it can make your face look longer, narrower, or even bigger. Take a look at this face chart, for example.
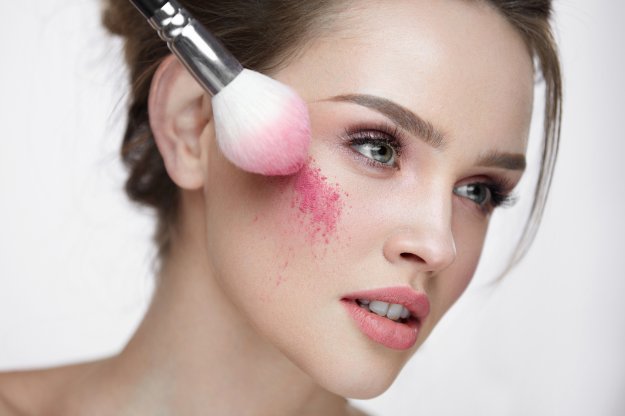
As a professional makeup artist, I’ve found that applying a cream blush under a powder blush helps in the longevity of the makeup. So I would normally dab and blend a cream blush first, and then I brush over a sheer wash of iridescent blush (like Nars Orgasm) for glowing, healthy-looking skin. Make sure the cream blush and the powder blush match.
If you’re going for a natural healthy glow, peach and pinks work well together.
Mauves and browns create more depth in the cheeks. I would apply this more along the outer perimeter of the cheek area, above where I would normally contour.
Apricot and champagne colors together create beautiful cheek dimension, which I would apply on the cheekbone area sweeping down to the apples. For additional information check out some of these cream blushes that you can use.
3. How to Apply Makeup Like a Pro: Contouring

Kim Kardashian may have made this technique popular today, but believe me, contouring has been around for as long as I can remember. Kevyn Aucoin is the creator of this cult makeup technique. When you say contouring, though, it automatically means you sculpt and highlight.
Sculpting is creating shadows to the areas of your face or even your body that you want to recede. In short, you push those areas away. Meanwhile, highlighting is when you pull areas on your face or body that you want to put a focus on.
For a more natural contouring, it’s best that you use cream products. Powder contouring products, on the other hand, will appear more pronounced, so they’re best for photo shoots or formal events. There’s only one key technique to contouring and that is blending! Whatever you do, you have to make sure that there will be no visible or harsh lines on your face. Everything should look seamless and you’ll be able to do that if you blend patiently.
4. How to Apply Makeup Like a Pro: Liquid Lipstick
It’s all about liquid lipsticks these days. If you have a hard time knowing how to apply makeup such as a liquid lip product, then you’re missing out on the fun. It’s a good thing I have this tutorial ready for you.
5. How to Apply Eye Makeup Like a Professional
Eyeshadow

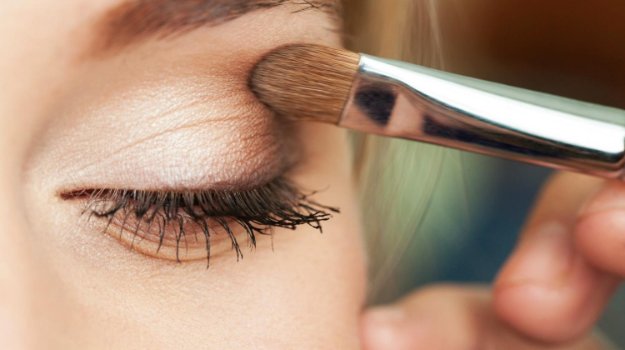
Knowing how to apply makeup, in this case, eyeshadow, takes practice. I find that the more I put makeup on myself or on others, the better I get at it. There are a lot of different eyeshadow products and it can be difficult to know how to apply makeup if you haven’t got the slightest clue on how to use them.
But for basics, this video by Daniella Mansutti shows you how to create a very basic and simple eyeshadow look just like how pros do it:
Eyebrows
Eyebrows can make or break your look. If you know how to apply makeup but don’t know how to do your eyebrows properly, then you need to learn how to do it.
Eyebrows generally start where the inner corner of your eyes start, but depending on how narrow you want your nose to look, you can fade the product towards the nose area closer to each other. As a general rule, your eyebrows can create an illusion of a narrower nose or a wider nose, depending on how far or close they are.
When applying an eyebrow product always start with the arch area, just because the application seems to be darker the first time you put the product on.
This video by MakeupbySaz will show you how to correctly fill your eyebrows like a pro:
Mascara and False Lashes
I love Mila Kunis’ eyelashes! She’s my number one peg when it comes to beautiful, fluttery lashes! However, not everyone is blessed with those long and curled lashes, that is why boxes of falsies are staples in my kit. It’s one thing to apply falsies to someone and another if you have to apply it to yourself.
You just need four products, though, tweezers, pocket mirror, eyelash glue and your falsies (I love using Cherry Lashes). Hold your falsies with your tweezers, place your pocket mirror on your palm or on a flat surface lower than your position. Apply glue to your falsies and let it sit for around 10-15 seconds. Then, look down at your mirror to apply your falsies. Read this article for a detailed tutorial.
This video from Kandee Johnson provides great hacks and MUA secrets for perfect makeup application:
Knowing how to apply makeup may be daunting to a lot of first-timers, but it’s a good thing that you can just wipe it off when you don’t like it. Keep practicing and working on your makeup skills because it’s something that takes time to master. Even professional makeup artists have to study and practice. I hope these makeup tutorials will help you apply makeup like a pro!
Ready to apply makeup like a pro? Share your thoughts with us in the comments section below!
Up Next: Baking 101: A Trend In Makeup Tutorials You Need To Know
Don’t forget to follow our Facebook, Twitter, Instagram, and Pinterest accounts to get the latest makeup, hair, and nail trends!
Editor’s Note: This post was originally published on December 14, 2016, and has been updated for quality and relevancy.