Many are resorting to DIYs now that everyone is advised to stay at home. While I have yet to see the need for this, I know a lot of you are dying to have a haircut. The question is, how do you cut your own hair at home while going to the salon is not an option?
Well, it’s definitely a scary thought! And I must admit it’s not for everyone. But guess what, it’s not as complicated.
Important Notes:
- This DIY is not meant to replace your professional hairdresser. It’s just a basic haircut to help you maintain your hair given the unfortunate circumstances we are facing.
- This tutorial is not for those with naturally curly or wavy hair who wear their hair in its natural state because it’s going to need a completely different process. But if you are curly or wavy but normally wears your hair straight then you can use this tutorial as well.
RELATED: 9 Easy Braided Hairstyles For Spring | Makeup Tutorials
How to Cut and Care for Your Hair When You Can’t Get to the Salon
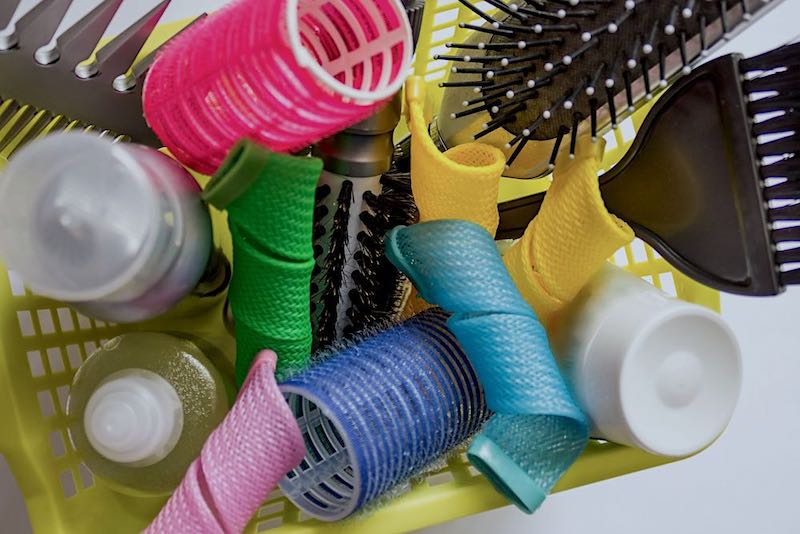
Tools You Need to Cut Your Own Hair

- Shears — DO NOT USE kitchen scissors. Shears are specifically made for hair cutting. It is designed to give you a comfortable wrist movement.
- Cutting Comb or Hair Dressing Comb — The best type is the one with both wide and fine tooth. You’ll see the huge difference when you section your hair.
- Sectioning Alligator Clips — The plastic ones are amazing because they don’t rust and they have flexible grip leaving your hair with no crease. You can get varying sizes that you can use for the different sections of your hair.
- Salon Styling Cape — You don’t have to purchase this if you don’t own one, you can instead use an old cloth or bath towel. Basically, the purpose of this tool is to not let the hair stick on your skin. However, the professional styling capes are also designed to also help the hair slide down the floor, so no sticking on the cloth as well.
- Set of Hair Tie — This is for sectioning your hair.
- Water Spray Bottle — You’ll need to get your hair to lay nice and flat as the water helps get those kinks and curls out while cutting your hair.
- Flat Iron (optional) — This is a must if you want to cut your hair dry.
- Large Mirror — Since you’ll be cutting your own hair you need to do it in front of a large mirror. This will help you constantly check on the length of your hair.
Step 1: Straighten Your Hair
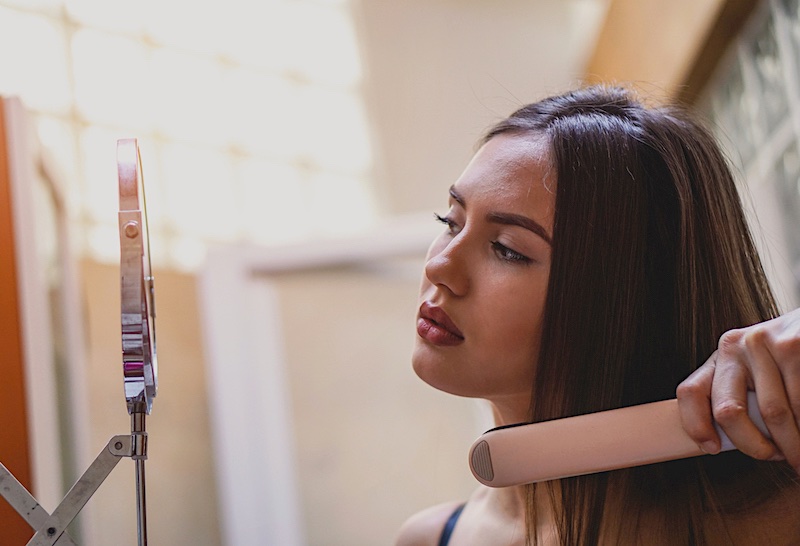
You can opt to cut your hair wet or dry but no matter what your choice is, it is vital to keep it super straight. From the front to the back and even the bangs (if you have one). Keeping your hair straight will help you in precision cutting.
Wet Hair Cutting:
- If you choose to cut your hair wet, simply spray it with water and gently comb it in the process to make sure it’s all straight.
Dry Hair Cutting:
- Get your reliable flat iron and straighten your hair all the way to the back, making sure all is nice and smooth.
Important Note: If you have a naturally wavy or curly hair, keep in mind that once you’re done with the whole hair cutting process your hair will shrink when it gets back to its natural state.
Step 2: Create Four Sections
Section your hair into four, not two! Why? Because sectioning your hair in two from the front will only create a lot of excess hanging length at the back that’s going to be really hard to fix. You’ll keep on cutting your hair at the back to make everything even without realizing your hair has gone short.
- First, part your hair into two sides just like how you part it normally whether to the side or to the middle.
- Next, find your apex (highest point of your head). Comb it and part it all the way down to the back of your ear.
- Put a styling clip to hold the two sections separately.
- Do this on the other side as well. You’ll end up having four even sections.
Step 3: Figure out How Long or Short You Want to Keep Your Hair

- You need to clip both of your two back sections first.
- Next, bring the two front sections forward.
- Look at the mirror and mark the length of your hair you want to cut.
- Work on one section first. Left or right, it really depends on you.
- Comb it straight as you move it to the side where your shoulder lies.
- Tie it to the length you want to cut. Make sure you put tension on your hair as you comb your hair flat.
- Do this in all four sections of your hair.
RELATED: 10 Breathtaking Silver Hair Colors For Stylish Women Who Are Also Funky
Step 4: Start Cutting Your Hair
- Do this in sections. Choose the front part, again it doesn’t matter whether you do the left or the right section first.
- Next, you do a point cut. It’s a way of cutting your hair either upward or downward not across or horizontal. This will give you a sharp line creating a blended effect.
- Then, move to the back section all the way to the other front side.
Important Note: The point cut is the safest way to cut your hair without ruining it. Do not attempt to do a blunt cut because you will need a professional hairstylist for that.
Step 5: Even out the Length of Your Hair
- You’ll find that there will be longer length in the two front sections of your hair, that’s okay because you can that even in no time.
- Comb the hair in front of your face.
- You’ll find the uneven length, and do a point cut until you get a more even cut.
- You could stop here or give more layers or styling to your hair.
Step 6: Give Your Hair More Layers (optional)
- Section your hair into four again.
- Point cut each section. You don’t have to make it perfect. Remember you’re just giving texture and body to your hair.
Step 7: Style It Up!
- You are all set!
- Blow-dry, curl or iron your hair, it’s really up to you.
Cutting your own hair should not be enough, you should learn to take care of it as well. Why not DIY some of the expensive hair products at home?
While I wouldn’t be recommending anyone to cut their own hair, the global health crisis we are all facing has forced us to be stuck at home. As such, we need to learn to do things on our own, even cutting our own hair. The thought of botching your hair is daunting but learning new tricks could be fun too!
Where you able to successfully cut your own hair? Maybe you have tips and tricks you can share with us, we’d love to hear them!
UP NEXT:
- 5 Medium Haircuts That Will Inspire You To Chop Off Your Long Locks
- 9 Easy Braided Hairstyles For Spring 2017 | Makeup Tutorials
- 15 Beauty Products For Spring Break | Makeup Tutorials Recommended
We aim to feature the best of the best in the makeup world, and maybe that can include you! CONTRIBUTE to us!
Follow us on Facebook, Twitter, Instagram, and Pinterest for the latest makeup, hair and nail trends. Don’t forget to subscribe to our Youtube Channel for cool makeup tutorials.