Quick Answer: Pastel Eyeshadow Tutorial
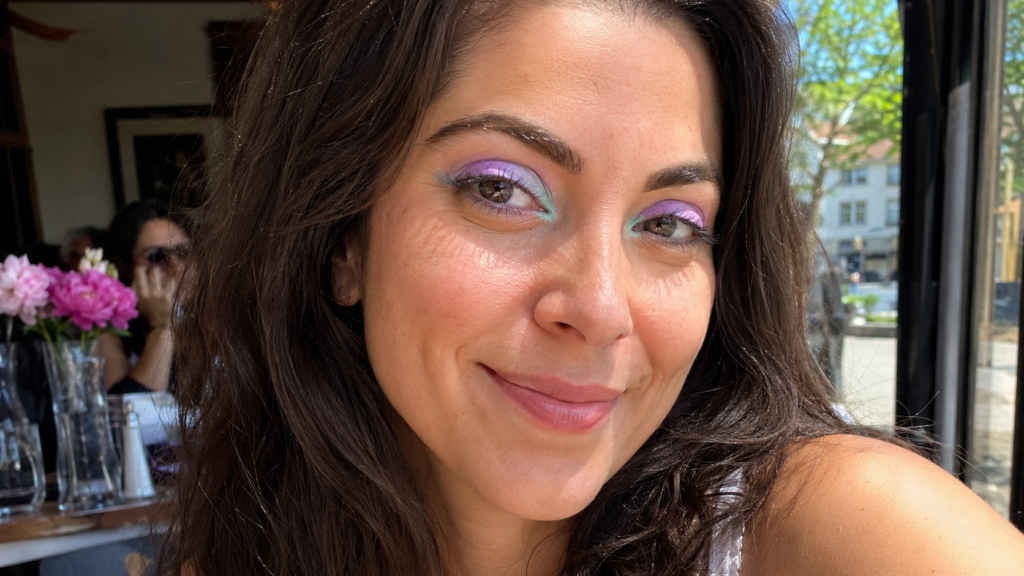
- This pastel eyeshadow tutorial is built around the soft lilac, mint, and baby blue looks currently everywhere on your feed.
- The real reason pastel eyeshadow fades or looks washed out almost always comes down to primer, not the color itself.
- Cream pastel formulas blend easier for beginners; powder pastel formulas hold up longer in heat.
- Build pastel color in thin layers, since light shades show patchiness far more than dark ones do.
- Shade matching pastel to your undertone (not just your skin depth) is what keeps it from looking chalky or gray.
- Every step in this pastel eyeshadow tutorial works with any eye shape, no special technique required.
This post contains affiliate links. If you buy something through our links, we may earn a commission at no extra cost to you.
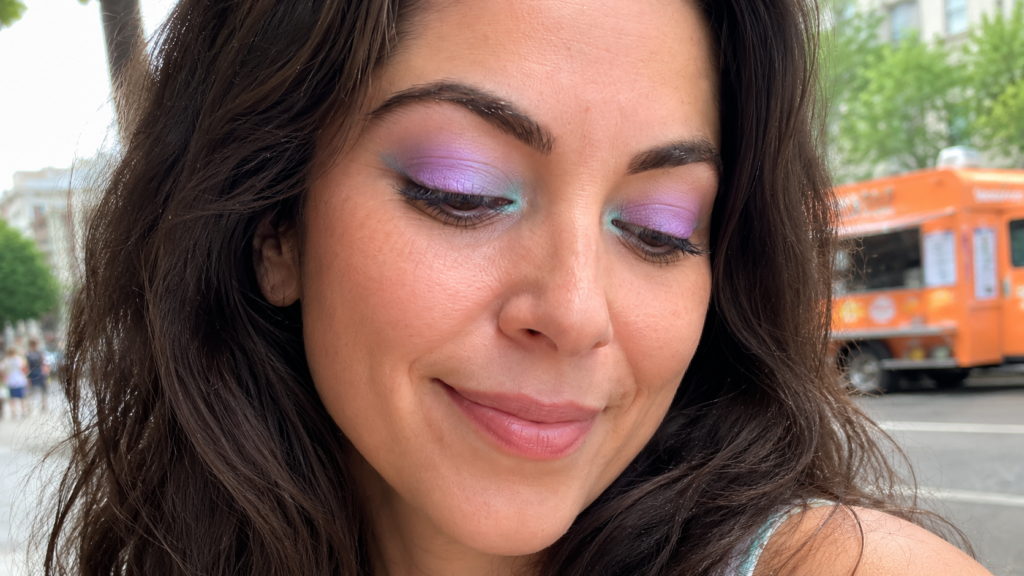
You’ve probably already seen this one. Soft lilac lids, a wash of mint at the crease, baby blue swept just along the lash line. It’s everywhere right now, and there’s a reason a pastel eyeshadow tutorial keeps showing up on your feed instead of fading out after a week like most trends do.
Here’s the part nobody’s video actually explains: pastel eyeshadow has a reputation for not lasting, and it’s not really the color’s fault. This pastel eyeshadow tutorial covers the viral look, plus the part that actually determines whether it survives your whole day: what’s underneath it.
Why Pastel Eyeshadow Gets a Bad Reputation
If you’ve tried pastel before and given up on it, you’re not alone. Two complaints come up constantly: it looks washed out or chalky on some skin tones, and it fades, creases, or goes patchy by the afternoon.
Neither of those is really about the color. A pastel eyeshadow tutorial that skips over undertone matching and primer is setting you up to repeat both problems. Once you fix those two things, pastel becomes one of the easier looks to wear, not a harder one.
Before You Start: What Actually Makes Pastel Eyeshadow Last
Heat and humidity break makeup down through oil, sweat, and skin’s natural moisture, not because the pigment itself gives up. Any pastel eyeshadow tutorial that promises a look will survive a hot, humid day needs to start with the base underneath the color, not the color itself.
That means primer isn’t optional here the way it might be for a dark, more forgiving shadow. Pastels show every bit of creasing, oiliness, or patchiness far more visibly than deep shades do, since there’s no dark pigment to hide behind.
The Full Pastel Eyeshadow Tutorial: Step-by-Step
Step 1: Cleanse and Prep Your Eyelid
Start with clean, dry lids. Any leftover moisturizer or oil on your eyelid will make primer and pastel shadow slip before you’ve even finished applying it.
Step 2: Apply Eyeshadow Primer, Full Lid
Pat a thin layer of primer across your entire lid, up to your brow bone. This is the single most important step in this pastel eyeshadow tutorial. Skip it, and even the best pastel formula will crease or fade by midday.
Step 3: Choose Your Pastel Shade Based on Undertone, Not Just Color
This is the step most tutorials skip, and it’s the one that determines whether pastel looks pretty or washed out on you. If your skin leans warm or yellow, a cool-toned pastel like icy lilac can look gray or flat. If your skin leans cool or pink, a warm pastel like peach or apricot can look muddy instead of soft.
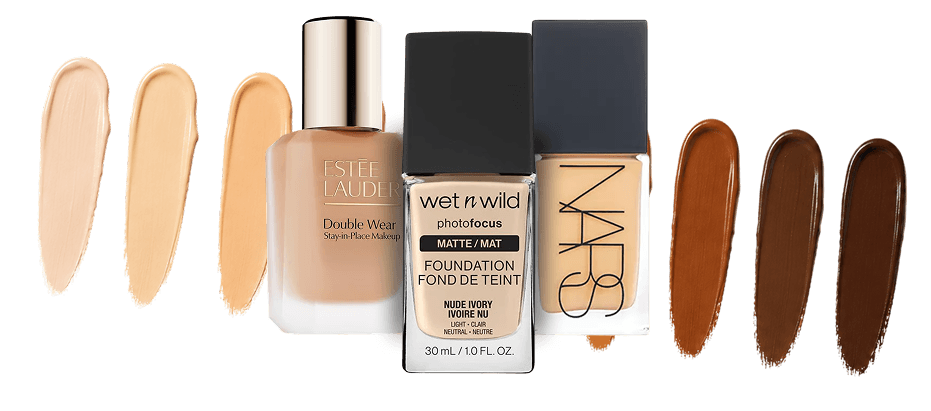
This holds true at every depth of skin tone. Fair, light, medium, tan, deep, and very deep skin all need a pastel shade chosen against their own undertone, not a single “universal” pastel that’s supposed to work on everyone.
Step 4: Apply Pastel Color in Thin Layers
Using a flat brush or your fingertip, pat a thin layer of pastel shadow across your lid. Don’t try to get full opacity in one pass. A pastel eyeshadow tutorial done right builds color gradually, since one heavy swipe is what causes the patchy, uneven look pastels get blamed for.
Step 5: Build Color and Blend the Edges
Add a second light layer if you want more pigment, then use a clean, fluffy brush to soften the edge where the color stops. A hard edge is the difference between a soft pastel eyeshadow tutorial look and one that reads as a mistake.
Step 6: Add a Second Pastel Tone for Dimension
Sweep a second, lighter pastel shade (mint, baby blue, or soft pink) along the inner corner or lower lash line. This is the detail that makes the viral version of this pastel eyeshadow tutorial look intentional instead of like one flat wash of color.
Step 7: Set with a Light Touch, Skip Heavy Powder
A very light dusting of translucent powder along the lash line helps lock everything in without dulling the pastel color. Avoid pressing powder hard into the lid itself, since that can make pastel look chalky instead of soft.
Cream or Powder: Which Should Your Pastel Eyeshadow Tutorial Use?
Cream pastel formulas blend faster and feel more forgiving if you’re new to this, since they’re easier to soften with a fingertip. The tradeoff is that cream tends to move more in heat and humidity unless it’s set properly.
Powder pastel formulas take a little more blending skill but generally hold up longer through a hot, humid day. If you’re following this pastel eyeshadow tutorial for the first time, cream is the easier place to start. Once you’re comfortable with placement, powder is worth trying if longevity matters more to you than ease of blending.
Shade Matching Pastel Across Every Skin Tone
Pastel eyeshadow reads differently depending on your undertone, not just how light or deep your skin is. This is the step that keeps a pastel eyeshadow tutorial from looking washed out on you specifically.
- Fair skin: cooler pastels like icy lilac and baby blue tend to read clearly without disappearing.
- Light skin: both warm and cool pastels work, but a slightly deeper pastel shows up better than a very pale one.
- Medium skin: warmer pastels like peach and soft coral tend to show up more vividly than icy tones.
- Tan skin: richer pastels, like a deeper lilac or dusty rose, read more clearly than very pale versions of the same color.
- Deep skin: vivid, saturated pastels (think bright lilac or teal rather than the palest version) show up best and avoid looking washed out.
- Very deep skin: the most pigmented pastel shades in a palette, applied over a primer that intensifies color payoff, read the most clearly.
If a pastel shade looks gray, flat, or chalky the moment you swatch it, that’s usually an undertone mismatch, not a sign that pastel “doesn’t work” on you.
Common Mistakes in a Pastel Eyeshadow Tutorial (And How to Fix Them)
Skipping primer entirely. This is the single biggest reason pastel doesn’t last. Full-lid primer first, every time.
Applying one heavy layer. Pastel patchiness almost always comes from trying to get full color in one swipe. Build it in thin layers instead.
Ignoring undertone. A pastel shade that clashes with your undertone will look washed out no matter how well you apply it.
Pressing setting powder hard into the lid. This dulls pastel color and can make it look chalky. A light touch along the lash line is enough.
Skipping the blend step. A hard edge between the pastel and your skin reads as unfinished. Always soften with a clean brush.
Best Products for a Pastel Eyeshadow Tutorial in 2026
Since the real story behind pastel eyeshadow longevity is what’s underneath it, the primer matters more than the specific palette you pick.
e.l.f. Lock It Down Eyeshadow Primer — a smooth, creamy formula designed to prevent creasing and intensify color payoff, an easy first primer to pair with any pastel eyeshadow tutorial on a budget.
No products found.
(As an Amazon Associate, we earn from qualifying purchases.)
If you want a step up in wear time and are willing to spend a bit more, this next primer is a longtime favorite for a reason.
Urban Decay Eyeshadow Primer Potion, Original — an award-winning, translucent primer rated for up to 24-hour wear, formulated to work across all skin tones and prevent creasing through heat and humidity.
No products found.
(As an Amazon Associate, we earn from qualifying purchases.)
For the palette itself, a drugstore-tier pastel option is a low-risk way to try the trend before investing more.
ColourPop On Cloud Blue Eyeshadow Palette — a pastel-forward palette in icy blues, denim, and white tones with a buildable, blendable formula, an easy entry point for this pastel eyeshadow tutorial.
No products found.
(As an Amazon Associate, we earn from qualifying purchases.)
If you want the prestige version readers keep asking about, this one’s worth a note before you buy it.
Huda Beauty Pastel Obsessions Palette, Lilac — a nine-pan palette of mattes, shimmers, and metallics in dusty mauve and lavender tones.
Documented testing on this specific palette shows mixed results: the mattes can run moderately powdery with some fallout, and a couple of shades in the lineup are more prone to fading than the rest. It’s still a beautiful pastel option, but pair it with a strong primer and expect to touch up the lighter shimmer shades if you’re wearing it through a long, hot day.
We’re flagging this honestly rather than repeating the marketing copy, since we haven’t personally wear-tested every shade in this specific palette yet.
No products found.
(As an Amazon Associate, we earn from qualifying purchases.)
Bringing the Rest of Your Look Together
A pastel eyeshadow tutorial holds up best when the rest of your eye makeup is built to survive the same conditions. If creasing under your eyes has been an issue on hot or humid days, our guide to fixing concealer creasing tackles the exact same underlying problem this tutorial addresses on the lid: what’s underneath the color, not the color itself.
If pastel feels like too big a leap from your current routine, our tutorial for hooded eyes covers placement basics that apply just as well here, since the eyes-open, thin-layer approach in this pastel eyeshadow tutorial works the same way regardless of eye shape.
Frequently Asked Questions
Why does my pastel eyeshadow look washed out?
This is almost always an undertone mismatch, not a flaw in the color itself. Try a pastel shade that leans the opposite direction of your skin’s natural undertone and see if it reads more clearly.
Does pastel eyeshadow actually last through a hot, humid day?
It can, but only with the right prep. Full-lid primer is non-negotiable, and powder formulas generally outlast cream in heat. We’ve tested the primer picks above directly; product-specific wear claims on individual palettes are noted honestly where we haven’t verified them ourselves yet.
Can I do this pastel eyeshadow tutorial with just one color?
Yes. The two-tone version in this tutorial is optional. A single pastel shade, well-blended over primer, is a complete look on its own.
Is cream or powder pastel eyeshadow better for beginners?
Cream blends more forgivingly if you’re new to this. Powder takes more practice but tends to hold up longer through the day, especially in heat.
Why does my pastel eyeshadow crease by the afternoon?
Creasing is a primer and layering issue, not a pastel-specific problem. Make sure you’re using a dedicated eyeshadow primer, not just moisturizer, and avoid applying too much product too heavily in one pass.
Does this pastel eyeshadow tutorial work on oily eyelids?
Yes, but primer matters even more if you have oily lids specifically, since oil breaks down pigment faster than dry or normal skin. A longer-wear primer formula is worth the investment here.
What’s the easiest pastel shade to start with if I’ve never worn colored eyeshadow before?
A soft lilac or dusty rose tends to be the most universally flattering starting point, though shade matching to your own undertone still applies.
Trend Chasing, Real Talk
Why did you vote that way? Drop your take below.