DIY skincare recipes are growing more and more popular online. With so many recipes available, it’s getting difficult to find the legit ones.
A lot of lab testing goes into formulating skincare, and DIY recipes are not exempt from research either. While there are ingredients such as coconut oil and green tea that have scientifically proven benefits, turning them into usable skincare is a different story.
A labor of love, I scoured the internet and found these recipes that will give you results and are even easy on the wallet!
RELATED: 5 Natural DIY Facial Moisturizer Recipes From Household Products
In this article:
Here Are DIY Skin Care Recipes That Will Get You Results
1. Oatmeal Facial DIY Skin Care Cleanser
Oatmeal and Honey are soothing skin-care staples because of their anti-inflammatory properties. As a bonus, honey is also an anti-septic and a powerful antioxidant.
You can add ground sunflower seeds to act as a physical exfoliant. The lactic acid found in yogurt is a mild chemical exfoliant for a thorough cleanse.
What You’ll Need:
- 1/2 cup oatmeal (uncooked)
- 1 tbsp raw organic honey or Manuka honey (Typically found in specialty health stores. Once in the grocery might have plenty of added sugar and is not pure.)
- 1 cup hot water
- blender or food processor
- medium-sized jar
How To:
- Pour in the hot water, oatmeal, and raw honey into a blender or food processor. Typically, we would combine wet ingredients before we add dry goods. Since there are only three ingredients, we can go ahead and mix all ingredients.
- Blend the ingredients together at high speed until it becomes a creamy, homogenous mixture.
- Finally, transfer your DIY facial cleanser into a jar.
2. Coconut, Vanilla, and Brown Sugar Exfoliating Scrub
If you’re feeling some texture on your face or if your lips are dry and chapped, then this scrub is perfect for you. Because the ingredients are all natural, it’s safe to use from your lips to your toes. Rinse off with warm water and a gentle cleanser to remove the excess oils.
This recipe is so easy to do, you won’t even need any equipment.
What You’ll Need:
- 1/3 cup extra virgin coconut oil
- 1 cup brown sugar (You may also use white sugar if you already have this at home, both types of sugar will produce the same effect.)
- 1 tsp vanilla (This is simply a scent, so feel free to use a different scent or essential oil.)
- 1 medium-sized jar
How To:
- Pour the extra virgin coconut oil, brown sugar, and vanilla into a mixing bowl. Feel free to adjust the amount of vanilla or essential oil in the recipe based on your preference.
- Next, mix all the ingredients thoroughly using a spatula. The consistency should be sticky and shouldn’t be too fluid. If you added too much oil, you can balance the consistency by adding more brown sugar.
- Transfer your DIY scrub to a 4-ounce jar.
How to use: Gently massage the scrub onto your skin. Pressing too hard on your skin might damage it.
3. Green Tea Mask
Grab your green tea bag and apply it directly to your face, but I have here a homemade skincare remedy far more potent than that. To my dry skinned beauties out there, I’ve got you covered.
Rehydrate parched, irritated, and acne-prone skin with matcha, honey, and aloe mask. Rejuvenate your skin with this antioxidant-fueled DIY skincare.
Matcha is the most concentrated form of green tea, hence a potent source of antioxidants. Raw honey is a natural anti-septic and will fight current breakouts and prevent future ones. Aloe vera is a heaven-sent soothing and moisturizing treatment.
What You’ll Need:
- 1 tsp matcha powder (Whenever you work with matcha, always begin with 1 tsp then adjust afterward. Don’t expect the matcha powder to melt into the honey and aloe completely.)
- 1 tsp raw honey (Raw honey means no added sugar typically used for baking.)
- 2 tsp aloe vera (Search for the purest gel possible.)
How To:
- Mix the raw honey and aloe vera gel thoroughly.
- Add in the matcha powder little by little so it will be easier to mix it with the honey and aloe gel.
- Finally, transfer to a jar.
RELATED: Best Moisturizers to Make for Your Skin Type | DIY Skin Care
4. Coconut Body Moisturizer
For parched skin, look no further than this DIY coconut body moisturizer. This moisturizer is a thick cream that will melt into the skin once applied. Because of the consistency of this cream, grab a jar as the mixture might not flow through a pump.
Note that coconut oil and vitamin E may be comedogenic to some skin types. Comedogenic products may cause breakouts and flareups, so don’t use this moisturizer on your face. Use this DIY moisturizer once a week to prevent the ingredients from clogging your pores.
What You’ll Need:
- 10 drops essential oil of your choice
- 1 teaspoon vitamin E
- 1 cup raw extra virgin coconut oil (This is the white coconut oil with a creamy consistency.)
- Optional: handmixer
How To:
- Whip the coconut oil for approximately 2 minutes or until it becomes a creamier, smoother consistency and there are no more lumps.
- Add 10 drops of your chosen essential oil and 1 teaspoon of vitamin E as an antioxidant and anti-inflammatory boost.
- Continue whipping the DIY moisturizer until it becomes a smooth and creamy homogenous mixture.
- Store in an airtight concealer to make sure that the oils in this recipe do not seep out.
5. DIY Pore Mask Skin Care

If you have big and congested pores, then you will love this recipe. In addition to being effective and easy to make, you probably already have the ingredients at home!
Yogurt contains lactic acid, a chemical exfoliator, and will help bring out the gunk in your pores. The gunk will then stick to the egg whites, while avocado will help calm and soothe your skin.
I use this gentle pore mask once every two weeks to keep my pores minimal. You can also use this as a spot treatment, focusing only on the nose and the forehead. Leave the mask on for 10 minutes then wash off with warm water.
What You’ll Need:
- 1 eggwhite
- 1 tbsp Greek yogurt (Must be unflavored.)
- 1/2 sliced avocado (Cut up the avocado to make it easier to blend later on.)
- Hand blender
How To:
- Separate the egg white from the yolk, and transfer the egg whites in a medium-sized bowl.
- Combine the egg whites, yogurt, and sliced avocado in the bowl.
- Finally, blend everything with a hand blender. I wouldn’t recommend a stand blender since this recipe is quite small and may not blend as well with a big blender. Blend until it becomes a homogenous mixture.
6. Yogurt Mask
This is a gentle mask perfect for when you’re experiencing breakouts and redness. It’s an acne treatment and a pore reducing, skin-soothing mask all in one! This is my favorite DIY skincare for acne, and I know you will love it too!
The lactic acid from the yogurt with slough off dead skin cells, clearing your pores and improving skin texture. Turmeric will fight acne and prevent the scarring after. Honey will heal, nourish, and moisturize your skin.
Leave this on for 10-20 minutes weekly to improve your skin’s overall health and luster. This recipe will be thick, so rinse off thoroughly with warm water afterward.
What You’ll Need:
- 1 tsp raw honey or Manuka honey
- 2 tbsp Greek yogurt
- 1/2 tsp turmeric powder
How To:
- Pour the honey, yogurt, and turmeric powder into a small bowl.
- Mix all the ingredients thoroughly. Bear in mind that it takes a while to break down the turmeric powder.
- When all the ingredients have become a homogenous mixture, transfer it to a small jar and store in the refrigerator.
7. Chamomile Soothing Eye Mask DIY Skin Care

Hear me out tea lovers out there! This one is especially for you. After downing your cup of chamomile tea, keep the tea bag and let’s make an eye mask out of it.
Let the tea bag cool and place it on your eyes. If you have allergies and have irritated eyes, this will help relieve and will soothe your skin.
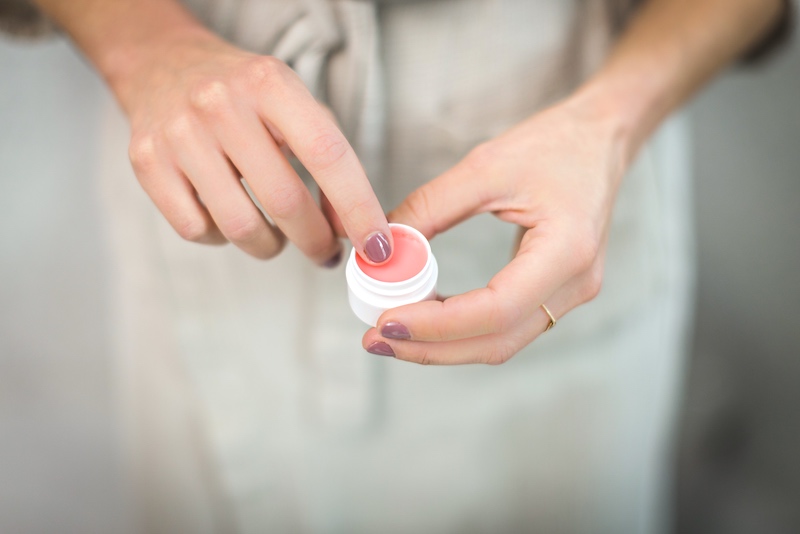
8. Peppermint Lip Balm

We’re used to shelling out $2-$5 dollars for lip balm, but today I have a recipe that will cost you less than a dollar for a tube!
This recipe is very hydrating, soothing, and all-natural! This is great for you if you love all-natural lip balm brands like Burt’s Bees.
You can choose a different type of essential oil, but if you will use a citrusy oil bear in mind that citrus-based skincare are photosensitive. You’ll have to refrain from using during the daytime, keep the product away from the sun, and will require a dark glass container to protect from the sun. For an on-the-go lip balm, stick to ingredients that are sun-friendly.
What You’ll Need:
- 2 tbsp extra virgin coconut oil
- 1.5 tbsp beeswax (This will give shape to our DIY skincare.)
- 10 drops essential oil of your choosing (I love peppermint for its scent.)
- 1 tbsp almond oil
- medium saucepan
- glass bowl
- small lip balm containers
- Optional: syringe
How To:
- Prepare a double boiler using your medium saucepan and glass bowl.
- Melt the beeswax in low heat until the wax has fully melted.
- Remove the bowl of beeswax from heat and add the coconut oil, essential oil of your choice, and almond oil.
- While the mixture is hot, transfer your DIY lip balm into small tins. You can use a syringe for this to make it easier to transfer the mixture into small containers.
9. Apple Cider Vinegar Toner
If it isn’t obvious by now, I’m a big fan of fermented skincare and AHA chemical exfoliators, so it only makes sense to include apple cider vinegar to the list!
Follow up your facial cleanser with a natural pH balancing toner that will also do wonders for acne-prone skin. Think of a toner as the last step of cleansing your face, clearing your pores of dirt and excess oil. With clear pores, our skin will be able to better absorb product later on.
What You’ll Need:
- 1/2 cup apple cider vinegar
- 1/2 filtered water
- 5 drops of Lavender essential oil (or any oil of your choice)
How To:
- Combine the apple cider vinegar and filtered water into a glass bowl. If you have normal to dry skin, lessen the apple cider vinegar and increase the ratio of filtered water.
- Add 5 drops of your favorite essential oil. I love lavender since this is a very calming oil, perfect for my nighttime routine.
- Mix thoroughly and transfer into a glass bottle with a stopper, or one with a pump that dispenses little by little. This recipe is very potent and a little goes a long way.
Top Beauty Tips
- Instead of layering product upon product on our skin, let’s focus on the basics that support our skin’s natural processes. In the long run, this will help our skin regulate its own sebum production and heal efficiently on its own.
- Citrusy oils are unstable and photosensitive, so it will lose its potency when overexposed to sunlight. Store the product in a dark glass bottle in a dry and cool area away from sun exposure. Refrain from using photosensitive skincare in the daytime since this will leave your skin sensitive.
- I never miss out on an opportunity to encourage patch testing! Our skin reacts differently to different ingredients and combinations. Do a 24-hour patch test before you introduce a new product to your regimen.
- Introduce them into your routine one by one so that you can pinpoint the effects of each product.
Check out this video by Buzzfeed Nifty for more was to DIY your skincare routine:
Now that we know how to make skincare products at home, I hope you were inspired to create your own customized routine! It’s a great habit to get to know the ingredients that are in our skincare and to do our own research on DIY skincare ingredients.
Do you have a no-fail recipe? Let us know in the comments section below! We’d love to hear from you.
UP NEXT:
- 7 Homemade Face Masks
- Diy Skin Care | Homemade Remedies: Acne Face Mask
- 7 Quick Mommy Makeup Tips For Busy Moms
We aim to feature the best of the best in the makeup world, and maybe that can include you! CONTRIBUTE to us!
Follow us on Facebook, Twitter, Instagram, and Pinterest for the latest makeup, hair and nail trends. Don’t forget to subscribe to our Youtube Channel for cool makeup tutorials.
Leave a Reply