Quick Answer: What is Blush Draping?
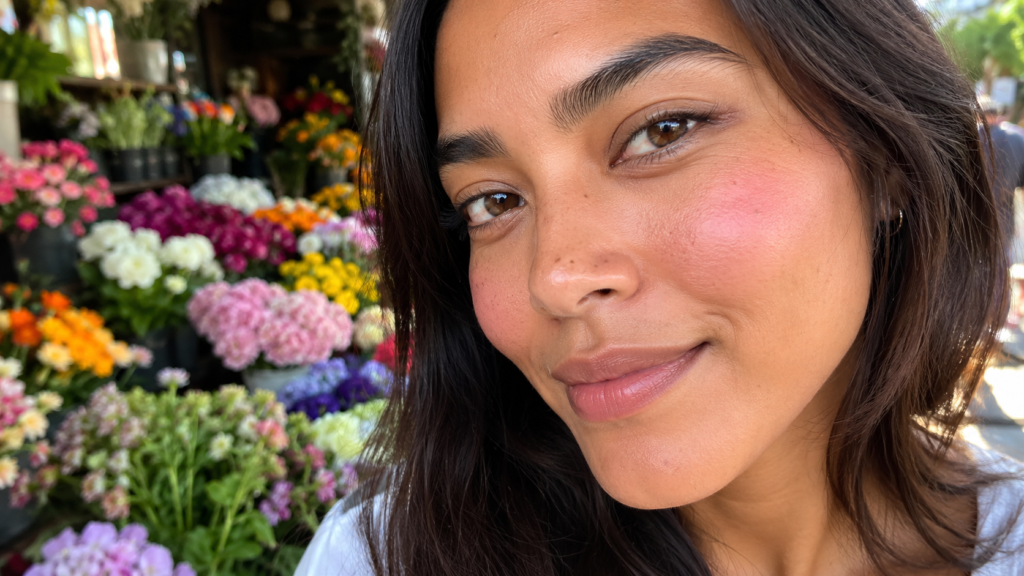
Blush draping is a technique that uses blush to sculpt and lift your face without bronzer. You sweep color from the highest point of your cheekbone up toward your temple, creating a flushed, lifted look with no harsh lines.
- Start at the highest point of your cheekbone, not the apple of your cheek
- Sweep upward toward your temple and hairline
- Blend until there are no visible edges
- Build intensity with a second pass only after you check in daylight
- Optional: dust a touch across the nose bridge for a sun-kissed finish
You’ve seen blush draping all over TikTok. One swipe, a quick upward sweep, and the whole face looks different.
So you tried it. And ended up with a blotch of pink on your cheek that looked nothing like the video.
That’s not a you problem. It’s a placement problem. Almost every beginner makes the same one.
This guide fixes it in one read.
What Is Blush Draping and Why Is Everyone Doing It in 2026?
Blush draping is a sculpting technique.
Instead of dabbing color onto the apples of your cheeks, you sweep blush along the top of your cheekbone and carry it upward toward your temple. The result reads like structure, not just pigment. Your cheekbones look higher. Your face looks lifted.
Where it comes from:
The technique started in the 1970s, when makeup artists were using bold blush across cheekbones and temples as the main sculpting tool, long before bronzer was standard. It came back on runways in 2016 in an exaggerated editorial form. Now in 2026 it’s everywhere on TikTok in a softer, beginner-friendly version.
Why it’s taking off now:
Cream and putty blush formulas have made blush draping easier than it ever was with powder-only options. You don’t need a full contour kit. You don’t need bronzer, a blending sponge, or a five-step face routine. You need one blush and the right starting point.
That starting point is where most beginners go wrong.
If you’re still getting comfortable with blush placement in general, our guide on how to apply blush walks you through the foundational technique before you layer in the draping sweep.
The One Placement Mistake That’s Ruining Your Blush Draping
Most tutorials tell you to start at the apples of your cheeks and blend upward.
That instruction is the problem.
When you start at the apple, you’re loading color onto the roundest, lowest part of your cheek. Blending upward from there doesn’t lift the color. It spreads a patch of blush across your face without creating any structural illusion.
One makeup artist put it plainly: “This will drag the face down rather than the snatched look.” — NewBeauty
Blush draping works because it puts pigment at the highest point of your face first.
That means starting at your actual cheekbone, not the apple. The apple is flesh. The cheekbone is structure. Those are two different locations.
How to find your starting point:
- Press two fingers lightly just below the outer corner of your eye
- You’ll feel a slight ridge
- That ridge, just above it, is where your blush draping starts
- Do this with your eyes open and your face relaxed
- The placement shifts completely when you’re squinting into a mirror
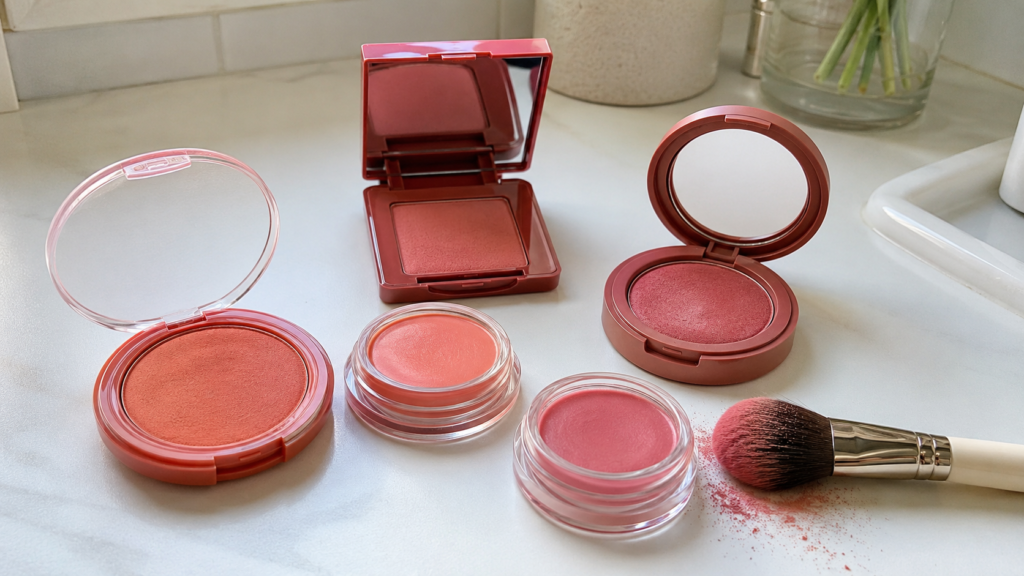
How to Choose the Right Blush Formula for Blush Draping
Blush draping covers a large zone of your face. That changes which formula you should use, because how a formula behaves over a small patch is different from how it behaves over a wide sweep.
Cream and putty formulas
Best for beginners. They blend with fingertips or a damp sponge. They don’t require a perfectly dry base. You press them in, sweep upward, and they melt into skin rather than sitting on top of it.
Powder blush
Works well over a set, dry base. Use a fluffy brush only. Skip over any dry patches before you start, because powder blush grabs onto dry texture and patches immediately.
What to avoid for blush draping:
- Liquid blushes with heavy shimmer or glitter: they slide across a large zone and pool in texture rather than blending out smoothly
- Silicone-based primer under a water-based liquid blush: the slip causes the blush to migrate before it sets, and the problem is invisible until it’s too late
- Heavy full-coverage powder foundation as a base for cream blush: the powder layer blocks adhesion
The safest beginner stack:
Tinted moisturizer or light liquid foundation as your base, followed by a cream or putty blush, finished with a light dust of translucent powder only if you need to set it.
The Best Drugstore Blushes for Draping Under $12
You don’t need a prestige blush to get this technique right. All four picks below have been evaluated across fair through deep skin tones. Shade recommendations for very deep skin tones are noted separately, as higher pigment density is the priority.
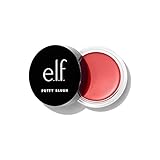
Pick 1: e.l.f. Putty Blush in Tahiti — ~$9
A cream-to-powder formula that gives you time to sweep and blend before it sets. Infused with argan oil and vitamin E, so it doesn’t grab on drier skin. The Tahiti shade works well for medium through tan skin with warm undertones.
- CREAM-TO-POWDER FINISH: Say hello to that island glow e.l.f. Putty Blush is a velvety, lightweight but buildable putty-to-powder blush that melts...
- LIGHTWEIGHT, BUILDABLE COLOR: Featuring a highly pigmented, silky-smooth formula, this blush blends seamlessly into skin and transforms from...
Last update on 2026-07-13 / Affiliate links / Images from Amazon Product Advertising API
(As an Amazon Associate, we earn from qualifying purchases.)
The e.l.f. Putty Blush is one of the most beginner-friendly formulas for blush draping because it gives you a long blending window before it sets. Use your fingers for the most seamless finish.
Pick 2: NYX Buttermelt Powder Blush — ~$10
A highly pigmented pressed powder infused with mango butter, almond butter, and shea butter for a non-patchy application. Delivers up to 12 hours of wear. The formula is specifically designed for cheekbone-to-temple draping placement. Available in 12 shades including deeper corals and reds that work for deep and very deep skin tones.

- Booming Pigment, Butta Blend & Butta Wear: See up to 12HRs of pigmented powder blush wear with Buttermelt Blush. This blush for cheeks has been...
- Blends Like Powder: Our vegan & cruelty-free blush powder comes in 12 shades that blend seamlessly and glide like butta, in soft matte & glowy...
Last update on 2026-07-13 / Affiliate links / Images from Amazon Product Advertising API
(As an Amazon Associate, we earn from qualifying purchases.)
The NYX Buttermelt is one of the few drugstore powder blushes with enough pigment density to read clearly on deeper skin tones in a single pass. Use a fluffy brush and a light hand on your first sweep.
Pick 3: Milani Baked Blush in Luminoso — ~$10
Baked on Italian terracotta tiles, so it has a warmth built into the formula that reads as a natural flush. Luminoso is a peachy-coral that complements warm and olive skin tones well. Buildable from sheer to saturated, which makes it forgiving if you go too heavy on the first pass.

- RADIANT BAKED BLUSH: Richly pigmented and highly buildable, the beautiful matte and shimmery shades of Baked Blush are the perfect cheeky pop of...
- AVAILABLE IN 12 SHADES: Choose from 12 different rosy shades to add a natural shimmer or matte finish to your complexion.
Last update on 2026-07-13 / Affiliate links / Images from Amazon Product Advertising API
(As an Amazon Associate, we earn from qualifying purchases.)
Milani Baked Blush in Luminoso works especially well for blush draping on medium through tan skin with warm or olive undertones. The baked formula blends more softly than a flat pressed powder.
Pick 4: Wet n Wild Color Icon Blush in Pearlescent Pink — ~$6
A velvety pressed powder that blends seamlessly and gives a soft-focus finish. At under $6, it’s the most accessible entry point for testing blush draping before committing to a pricier formula. Pearlescent Pink suits fair through light skin with cool or neutral undertones. The formula is jojoba-oil infused, which keeps it from patching on drier skin.
[AAWP Block — ASIN: B0D184M7NJ]
If you want to test blush draping without spending more than $6, the Wet n Wild Color Icon is where to start. It’s forgiving, it blends cleanly, and the payoff on fair to light skin is immediate.
Shade equity note: The picks above cover fair through deep skin tones. For very deep skin tones, prioritize pigment density over shade family. A blush that reads as pigmented in the pan but delivers a low-payoff first pass on deep skin will require multiple passes before the draping shape is visible, at which point the edges are already difficult to blend. The NYX Buttermelt is the strongest performer in this range from the four picks above.
How to Do Blush Draping Step by Step
Work through these in order. Each step is one action. Don’t skip ahead.
Step 1: Prep your base
Apply your foundation, BB cream, or tinted moisturizer as you normally would. Keep coverage light over the cheek zone if possible. Don’t powder your cheeks before applying blush if you’re using cream or putty formula.
Step 2: Find your cheekbone starting point
With your eyes open and face relaxed, press two fingers just below the outer corner of your eye. Feel for the slight bony ridge. The point just above that ridge is where your blush draping begins. Tap it lightly so you remember the location.
Step 3: Load your brush or fingers at 40% product
Tap your brush lightly into the pan twice. Don’t swirl and pick up a full load. If you’re using a cream or putty formula, press one finger lightly into the product and then press it once against the back of your hand to reduce the amount before touching your face.
Step 4: Apply your first blush draping pass
Place the brush or your finger at the cheekbone point you located in Step 2. Sweep upward toward your temple and hairline. The motion goes up, not sideways. If it’s angling toward your ear, redirect it toward your hairline. One smooth pass, then stop.
Step 5: Step back and check in daylight
Move at least five feet from your mirror and look in natural or daylight-matching light. The blush draping effect is designed to read at a distance, not at close range. If the flush is visible and lifted at five feet, you’re done with this pass. If it’s too subtle, move to Step 6. If it looks like regular blush on your cheek, your starting point was probably too low — go back to Step 2.
Step 6: Build your second pass if needed
If you want more intensity, apply a second pass in the temple zone only. Don’t go back toward the cheek. Adding more product closer to the face pulls the color downward rather than extending the lift.
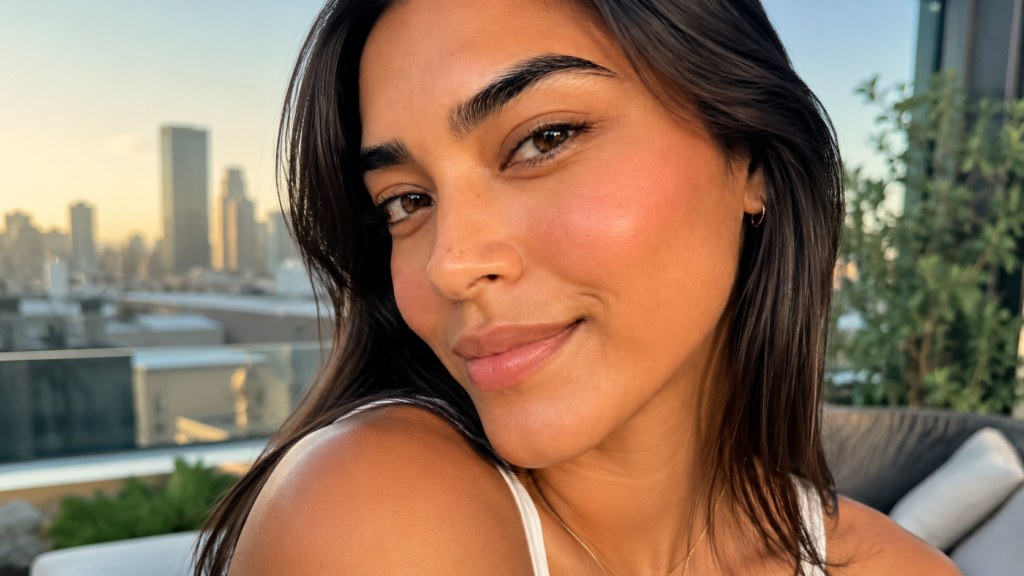
Nano Banana Prompt [Close-up, high-definition, GRWM-style portrait of a woman with medium tan skin pressing a brush lightly against her temple and hairline area to deepen the blush draping color there. The cheekbone-to-temple gradient is visible: softer near the cheekbone, slightly more saturated at the temple. Skin looks healthy and luminous. Warm vanity lighting with soft shadows. No brand logos or readable product labels visible anywhere in the scene.]
Step 7: Optional nose bridge dusting
For a sun-kissed, monochromatic finish, take whatever is left on your brush after Step 6 and lightly dust across the bridge of your nose. Don’t reload the brush for this step. The residual product is the right amount.
Blush Draping by Face Shape: Quick Placement Adjustments
The core blush draping sweep stays the same for every face shape. These are small adjustments to starting point and direction only.
Round face: Angle your sweep higher and aim more toward the hairline than the center of your face. Less color toward the nose, more toward the temple.
Oval face: Follow your natural cheekbone curve. The standard sweep works as-is. No adjustment needed.
Square face: Start your sweep slightly lower on the cheekbone and soften the upward angle. This reduces the emphasis on angular lines rather than sharpening them.
Long or narrow face: Before your draping sweep, add a small amount of blush to the apples of your cheeks first. Then do the upward sweep from your cheekbone. The apple color adds width; the sweep adds structure.
Heart-shaped face: Apply blush slightly lower than the standard starting point and blend a touch toward the nose rather than straight up. This balances the wider forehead.
Blush Draping by Skin Tone: Shade Matching
Shade selection determines whether your blush draping looks like skin or like applied makeup. Undertone match is the variable that most beginners skip.
Fair skin with cool undertones
Soft pink and berry blushes read cleanly. Peach shades can pull orange. Start with a sheer pink and build.
Fair to light skin with warm or neutral undertones
Peachy-pink shades work well. Avoid anything with heavy shimmer on the first draping pass.
Medium skin with warm undertones
Coral and warm rose shades complement the undertone without reading muddy. Luminoso from Milani is a reliable starting point.
Medium to tan skin with olive undertones
Warm peach and terracotta shades work better than cool pink, which can read flat on olive skin.
Deep skin
Prioritize pigment density. A lightly pigmented blush in a theoretically correct shade won’t read on deep skin in one pass. Brick-red, deep rose, and rich berry shades with high pigment load are the right category.
Very deep skin
The same density rule applies. The NYX Buttermelt Blush carries enough pigment to deliver visible blush draping in a single pass on very deep skin. Shade picks in bolder coral and cherry red are available in the line.
Shade picks above have been evaluated across fair through deep skin tones. Testing for very deep skin tones relied on pigment density data and brand shade documentation. If you have a shade that works better for you, the technique in Steps 1 through 7 applies regardless.
Common Blush Draping Mistakes and How to Fix Them
Starting at the apple of your cheek
This is the most common blush draping mistake. The apple sits lower and forward on the face. Starting there means you’re building color downward, not upward. Fix: Go back to Step 2 and re-locate your cheekbone ridge.
Sweeping toward your ear instead of your hairline
A sideways sweep adds width to the face, not lift. Blush draping creates lift by pointing color upward. Fix: Redirect the brush so it’s pointing toward your eyebrow and hairline, not your ear.
Using a glitter or ultra-shimmer liquid blush
Extra-shimmer formulas don’t stay in the draping zone. “Extra-creamy or glittery formulas don’t do well over big areas. They tend to slide, crease and turn your sculpt into a hot spot instead of a softly lifted flush.” — NewBeauty. Fix: Switch to a matte or satin formula for draping. Save the glitter liquid for targeted highlight only.
Over-applying in one pass
Blush draping is a large zone. Saturating it in one pass makes edges impossible to blend. Fix: Start at 40% product load, do one pass, step back, then decide if you need more.
Checking in the wrong light
Bathroom overhead lighting reads blush as darker than it is. If your blush draping looks too strong in your bathroom mirror, check it in natural daylight before removing any product. It may already be exactly right.
Conclusion
Blush draping comes down to one placement fix, one formula check, and one daylight step.
Start at your cheekbone, sweep toward your hairline, and check from five feet before building. That’s it. The technique isn’t complicated once your starting point is right.
Every drugstore blush in this guide will get you there for under $12. The only thing it costs you is starting at the apples.
Frequently Asked Questions About Blush Draping
What is the difference between blush draping and regular blush application?
Regular blush is applied to the apples of the cheeks for a rosy, rounded flush. Blush draping sweeps color from the high point of the cheekbone upward toward the temple, creating the illusion of lifted structure. The technique uses blush the way bronzer is typically used for contouring.
Do I need a special brush for blush draping?
No special brush is required. A fluffy powder blush brush works for powder formulas. For cream and putty formulas, your fingers or a damp makeup sponge give the most seamless blend. The key is light product loading on whatever tool you use.
Can blush draping work on round faces?
Yes. For round faces, aim the sweep higher and more toward the hairline rather than the center of your face. Keeping color away from the nose and concentrated toward the temple creates a lengthening effect that complements round face shapes.
What’s the best drugstore blush for blush draping?
The e.l.f. Putty Blush is the easiest pick for beginners because the cream-to-powder formula gives you a long blending window. The NYX Buttermelt delivers the strongest pigment payoff across all skin tones, including deeper ones. Both are under $12.
Can I use cream blush for blush draping?
Yes, and for beginners, cream is often the better choice. Cream blush stays workable longer than powder and blends with fingertip warmth, which makes it easier to adjust placement before it sets. Apply it over a light base without heavy powder underneath.
Why does my blush look patchy after blush draping?
Patchiness usually comes from one of two things: a dry or over-powdered base that grabs the blush unevenly, or a powder blush applied over damp or under-moisturized skin. Prep with a light layer of moisturizer, let it absorb fully, then apply a light base before your blush draping.
Poll: The Blush Draping Debate
Why did you vote that way? Drop your take in the comments.