• Home
  • Tutorials
    • Beauty Basics
    • Tips & Tricks
    • Product Reviews
  • Looks
    • Day
    • Night
    • Work
    • Seasonal
    • Celebrity
    • Special Effects
    • Bridal Looks
  • Hair + Nails
    • Bangs
    • Braids
    • Curly Hair
    • Hair Accessories
    • Hair Color
    • Hair Curling
    • Hair Straightening
    • Nails
  • Fashion
  • Trends + News
  • Cart
Makeup Tutorials Logo
  • Beauty Basics
  • Tips & Tricks
  • Product Reviews
You are here: Home / Nails / DIY | Fun Gel Nails At Home Perfect For No Makeup Look

DIY | Fun Gel Nails At Home Perfect For No Makeup Look

September 11, 2024 By Karen Lang

Who says you can’t do gel nails at home? If you love the no makeup look then this step by step gel nails tutorial is perfect for you!

This tutorial is not only fun it’s also relatively easy to do. The best part is it you can do this in the comfort of your home. You might need some extra equipment but investing in a UV lamp can actually help you save a lot of bucks and time for your manicure.

DIY | Fun Gel Nails At Home Perfect For No Makeup Look

Complement Your No Makeup Look With This Gorgeous Gel Nails At Home…

This post was originally posted on Nail Designs and shared with permission.

If you’re one of those very busy people who can’t go to the nail salon on a regular basis for manicures and pedicures, then do your own gel nails at home!

Not only does gel polish look glossier and prettier than a regular manicure, it can also last up to 3 weeks without getting peeled or chipped off. Perfect for those who can’t go to the salon every other week!

You might need some extra equipment but investing in a UV lamp can actually help you save a lot of bucks and time for your manicure. Getting your nails “cured” with the UV light right after applying them dries the polish up right away. You also don’t have to wait a long time for your new manicure to dry.

Now you can get gel nails at home with these easy steps from JauntyJuli!


What you’ll need to make gel nails at home:

  • Gelish pH Bond Dehydrator
  • Gelish Gel Base and Top Coat
  • Madam Glam Baby Pink Gel Polish
  • Vanity Planet Glow Dry Led Lamp
  • Nail File
  • Cuticle Pusher
  • Nail Buffer
  • Cuticle Oil


Step 1: Clean Nails

First off, your nails need to be clean. To get salon perfect gel nails at home, you need to push back your cuticles entirely to avoid the gel from lifting once your nails start to grow.

You should also file and buff your nails to take away the shine. This will help the gel to stick on your nails better.

After buffing, just clean off the dust accumulated from your buffing and filing.


Step 2: Dehydrate Nails

Apply a dehydrating solution to your freshly buffed nails to take away moisture. If you don’t have the solution, you can use rubbing alcohol as an alternative.

On the other hand, you can also purchase the solution, as well as the gel base and top coat as a set, from Gelish here.


Step 3: Apply Base Coat

Check out DIY | Fun Gel Nails At Home Perfect For No Makeup Look at https://makeuptutorials.com/gel-nails-at-home/

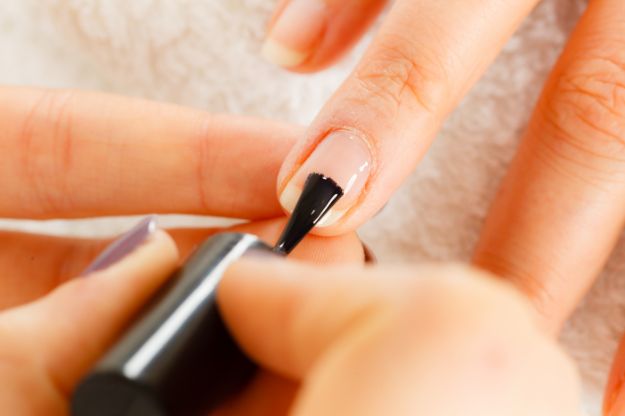
Now you’re ready to apply a base coat. Cover your nails with the coat completely but try to make it as thin as you can for a cleaner and more even effect. Do not forget to even out the tip to avoid gaps in the gel.


Step 4: Cure Nails

Once you’ve finished your base coat, it’s time to cure your nails.

Curing is when you hasten the drying of the gel polish using a UV lamp. Unlike regular polish, the gel will instantly harden after being exposed to the UV light, significantly cutting the time you have to spend trying to dry your nails!

After curing your base coat for 15 seconds, you can now move on to the next step to have your gel nails at home. Although they would still be a bit wet after curing, you don’t have to worry, because the gel has already infused with your nails by this time.


Step 5: Apply Nail Polish

Check out DIY | Fun Gel Nails At Home Perfect For No Makeup Look at https://makeuptutorials.com/gel-nails-at-home/

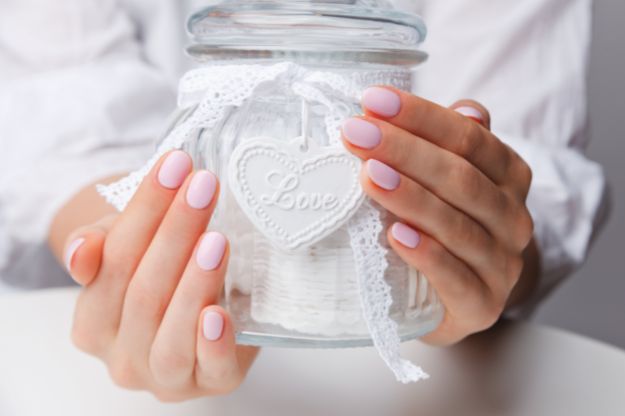
Pick out the color that you want to use on your nails. This tutorial used a Baby Pink from Madam Glam. Remember you can choose whatever color you want to use for your gel nails at home and even design your own!

After picking out the shade that you want, apply the gel polish on your fingernails. Cure it for 15 to 30 seconds.

Make sure to wipe off excess polish from your skin before curing as it will burn under the UV light.


Are you excited to see the full tutorial? Check out Nail Designs for the complete guide on how to do gel nails at home.

Have you tried doing gel nails at home? Please share your thoughts in the comments section below. You can also share your work on my  Facebook, Twitter, Pinterest, and Instagram!


Rate this post

Filed Under: Nails

Subscribe To Our Newsletter

FREE MAKEUP GUIDE
Fuller Lips: Simple Makeup Techniques for a Plumper Look

Fuller Lips: Simple Makeup Techniques for a Plumper Look

Beauty trends come and go. The good ones manage to stick around because they make people feel a little more confident. A great example of a timeless trend that continues to stay in style? A full-looking lip. Fuller lips have become one of beauty’s most desired features. In fact, many people choose in-office treatments to…Continue Reading

Makeup Tool Showdown: Brushes vs Fingers vs Sponges

Makeup Tool Showdown: Brushes vs Fingers vs Sponges

We’ve all been there: staring at our makeup tools and wondering whether we should go for a brush, grab a sponge, or use our fingers. With so many options to choose from, picking the right makeup tool can be challenging. Fear not, because we’ve broken down each tool’s strengths, so you can find what works…Continue Reading

Sunburnt Blush: The Viral Makeup Trend That’s Perfect for Summer

Sunburnt Blush: The Viral Makeup Trend That’s Perfect for Summer

Most summer blush styles focus on shimmer or glow. But along comes a unique trend that’s dominating the season: sunburnt blush makeup. Basically, it copies the natural redness that shows up on your face after spending time in the sun. Currently, this technique is resurfacing because many agree that the resulting look feels casual and…Continue Reading

90s Supermodel Makeup: From Runway to Afterparty Without Touch-Ups

90s Supermodel Makeup: From Runway to Afterparty Without Touch-Ups

It’s late, and you’re at a 90s afterparty. The air smells like hairspray and designer perfume. Someone’s laughing near the mirror while still fixing a shoe strap. Some models have already changed clothes, but their faces still look the same. This is where 90s supermodel makeup showed what it was really made for. 90s supermodel…Continue Reading

Go Shopping

  • Scrumptious
  • Mason & Ivy
  • Ulta
  • Julep
  • e.l.f. Cosmetics

Other Great Sites

  • You’re So Pretty
  • Nail Designs
  • DIY Projects
  • Homemade Recipes
  • Cute Outfits

Resources

  • PUR Cosmetics
  • Beauty Tips & Tricks
  • Product Reviews
  • Eyeliner Hacks
  • Makeup Organizers
  • About Us
  • Contact Us
  • Advertise With Us
  • Write For Us!
  • Privacy Policy
  • Terms and Conditions
Makeup Tutorials

Email Support: support@makeuptutorials.com
Phone: (512) 872-2830

Copyright © 2025 · Makeup Tutorials


This copyrighted material may not be republished without express permission. The information presented here is for general educational purposes only.

MATERIAL CONNECTION DISCLOSURE: You should assume that this website has an affiliate relationship and/or another material connection to the persons or businesses mentioned in or linked to from this page and may receive commissions from purchases you make on subsequent web sites. You should not rely solely on information contained in this email to evaluate the product or service being endorsed. Always exercise due diligence before purchasing any product or service. This website contains advertisements.