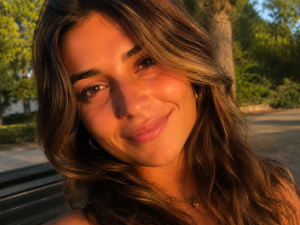
How many selfies did you take before finding the right one? If it’s more than one, you’re not alone. Looking good in person and looking snatched in photos are two very different skills. The camera sees everything: uneven foundation, oily spots, even that sneaky mascara smudge. But don’t worry! You don’t need to be a pro to look flawless. A few simple tweaks can take your makeup from “meh” to “wow” in every shot. Ready to slay? Let’s spill the tea on how to get a camera-ready makeup and look like a total icon.
Snap-Worthy Skin: Your Camera-Ready Makeup Cheat Sheet
You know that moment when you feel fabulous, take a selfie, and—boom! Your makeup ends up looking off. The shine, the streaks, the smudges—where did they even come from? But here’s the good news: it’s totally fixable. Let’s dive into the best tricks to nail a camera-ready makeup look every single time.
1. Prepping Your Skin: Where the Glow Begins
If your skin isn’t prepped, your makeup will let you down—hard. A good base starts with healthy skin, and healthy skin starts with just a few extra minutes of prep.
First, exfoliate to get rid of dry patches or texture. Smooth skin equals smooth makeup, period. Then moisturize with something lightweight and hydrating. The goal is fresh, dewy skin, not shiny or greasy.
Now here’s the real icon: primer. If your T-zone is an oil slick by noon, grab a mattifying primer. Want a soft glow? Opt for an illuminating one. Either way, primer is non-negotiable as it keeps everything locked and loaded.
⚠️ Pro Tip: If you’re using flash photography, skip SPF-heavy products. Trust me, no one wants to look like a ghost with flashback.
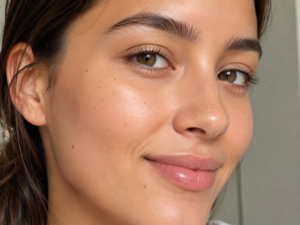
2. Foundation That Matches and Blends Like a Dream
A great camera-ready makeup look starts with your foundation, but it’s gotta look natural. Here’s the trick: less is more. Start light and build coverage only where you need it. Then, use a damp beauty sponge to bounce and blend. Don’t forget to check your jawline and hairline. Any unblended streaks? Cameras love catching those.
Shade also matters big time. Test the foundation on your jawline in natural light. A seamless match between your face and neck is what makes you look polished and not painted.
✨ Pro Hack: Mix a drop of liquid highlighter into your foundation for a subtle glow. It’ll look like your skin, but better.
3. Contour and Highlight Like a Pro
Photos flatten your features, so adding dimension can change that. Enter: contour and highlight. These two together can transform your face faster than a good filter. For contour, stick to matte shades. Sweep it under your cheekbones, along your jawline, and lightly down the sides of your nose. Blend, blend, blend—no one wants contour stripes in HD.
For highlight, keep it soft. Apply a touch on your cheekbones, nose bridge, and Cupid’s bow. Just don’t go overboard. Cameras pick up shimmer fast, and too much can make you look greasy instead of glowy.
4. Eyes That Command Attention
Your eyes are the first thing people notice in a photo, so make them pop. Start with your lashes—curl them and apply volumizing mascara. For even more drama, add a pair of false lashes. When it comes to shadow, neutral tones are your best bet. They add depth without stealing the spotlight. Want shimmer? Go for it, but keep it minimal. Glitter fallout can ruin even the best looks.
Finally, finish with eyeliner. A sharp wing elongates your eyes, while tightlining (lining your upper waterline) makes lashes look thicker. To brighten tired eyes, use a nude liner on your lower waterline. Trust me, these work like magic.
5. Set It and Forget It
What’s the point of all this effort if your makeup doesn’t last? Setting products are the answer. Start with a translucent powder. Focus on your T-zone to control shine but go light. Too much powder can make your skin look flat in photos. Then, lock it all in with a setting spray. This not only keeps your makeup in place but also melts everything together for a seamless finish.
Why It Matters: A good setting spray can save you from mid-event touch-ups. You’re welcome.
6. Lips That Slay
Your lips tie everything together, so don’t skip them. Start with a lip liner to define your shape and prevent feathering. A slightly darker liner also gives the illusion of fuller lips. For lipstick, choose a satin or matte formula in bold colors (red or plum) as they photograph beautifully. But if you want something low-key, a nude lip is always a win.
Pro Move: Dab a tiny bit of gloss in the center of your lips for a plump, pouty effect.
7. Lighting and Angles: The Unsung Heroes
Even flawless makeup can’t save you from bad lighting. Natural light is your best friend, so stand by a window when you take selfies. If you’re indoors, invest in a ring light. When posing, tilt your head slightly to add dimension to your face. It’s a small trick, but it makes a big difference.
You’re Ready to Shine!
That’s it! You’re now armed with all the secrets to a camera-ready makeup look. Whether it’s selfies, portraits, or group shots, these tips will have you looking flawless every time. The best part is, you don’t need to be an expert to nail these looks. With a little practice, you’ll be snapping picture-perfect shots like it’s second nature. Now go, glow, and don’t forget to tag me in your bomb selfies.
FAQs: Camera-Ready Makeup Tips
- Why does my makeup look good in person but bad in photos?
Lighting or SPF-heavy products might be the culprits. - How do I avoid flashback in photos?
Skip SPF and use flash-friendly setting powder. - What’s the best way to prevent shine in pictures?
Use a mattifying primer and translucent powder on your T-zone. - How do I make my eyes look bigger in photos?
Tightline your upper lash line and use nude liner on your lower waterline. - What’s the best lighting for selfies?
Natural light or a ring light works wonders. - Can I wear bold lipstick in pictures?
Yes! Pair it with balanced eye makeup for a cohesive look. - How do I keep my makeup from smudging?
Set it with powder and a long-lasting setting spray. - What foundation finish looks best on camera?
A natural, satin finish is universally flattering. - Do I need false lashes for photos?
Not always, but they add drama and make your eyes pop. - How can I stop my makeup from looking cakey?
Apply in thin layers and blend well. Use setting spray to soften the finish.