Quick Answers: Monolid Eye Makeup
- Monolid eyes have no visible crease, which means standard tutorial placement maps don’t apply. Shadow and liner need to be placed for what’s visible at eye-open position, not eye-closed position.
- Eye primer is the most important product in a monolid eye makeup routine. Without it, shadow migrates and liner transfers upward onto the lid surface within a few hours.
- Horizontal gradient placement keeps eyeshadow visible on monolids. Concentrate darker shades at the outer third of the lid and lighter shades toward the inner corner, rather than blending vertically from lash line upward.
- Waterproof eyeliner at the lash line isn’t optional in summer. The natural fold of a monolid creates friction against the lash line during eye movement, and non-waterproof formulas transfer upward and reverse the look entirely.
- Monolid eyes are built for floating liner, graphic liner, and lower lash line techniques that struggle on other eye shapes. These aren’t workarounds. They’re the looks this eye shape does best.
- Lash curling matters more on monolids than on almost any other eye shape. Straight lashes sit flat against the lid surface and disappear into the fold. A curled lash breaks the lid line and creates definition on its own.
- Pigment concentration in eyeshadow matters more on monolids than on other eye shapes. A low-pigment formula fades to near-invisible on a smaller lid surface, especially in summer heat.

If you’ve ever spent twenty minutes on an eyeshadow look that vanished the moment you opened your eyes, you already know the core problem with most monolid eye makeup tutorials. They weren’t built for your eyes. They were built around a crease that doesn’t exist on your face, and every placement instruction followed from that assumption.
Monolid eye makeup doesn’t work on a different scale. It works on a different coordinate system. The usable lid surface shifts when your eyes are open. The fold creates friction that destroys non-waterproof formulas. Summer heat accelerates all of it. And the techniques that do work on this eye shape, including floating liner, aegyo sal, and horizontal gradient shadow placement, show up almost nowhere in mainstream beauty content.
This article covers the full picture: anatomy, formula selection, technique, and a step-by-step summer tutorial with product picks that have been evaluated specifically for this eye shape.
What Makes Monolid Eyes Different, and Why Most Tutorials Get It Wrong
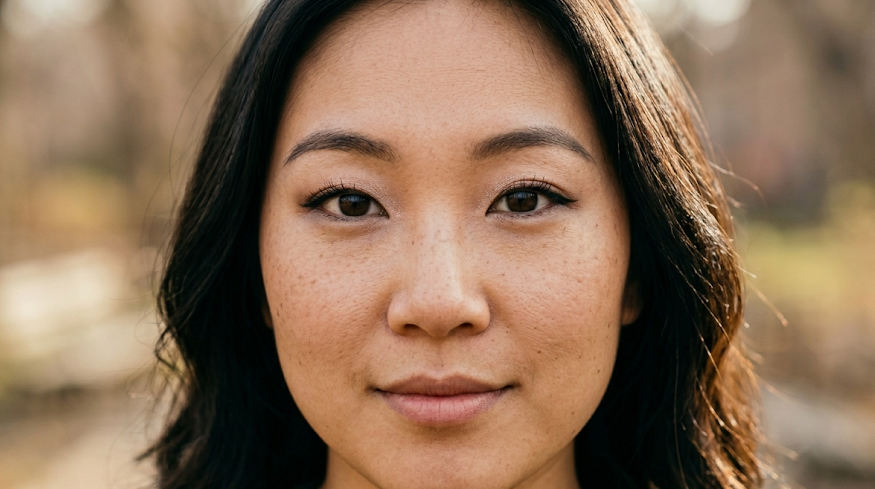
A monolid eye has no visible crease dividing the lid into sections. When your eyes are open, the lid surface either partially or fully disappears under the upper eyelid. The result is a smooth, continuous surface from the lash line to the brow bone, with limited visible real estate once you’re actually wearing the look.
This creates two issues that standard tutorials don’t account for.
- The first is placement. Most eyeshadow instruction tells you to apply color in the crease, blend upward into the transition zone, and concentrate depth at the outer V. On a monolid, there’s no crease to anchor any of that. When you apply shadow with your eyes closed and follow standard placement instructions, you’re placing product in a zone that becomes invisible once your eyes open. The look you built doesn’t exist in the mirror. It only existed on your closed lid.
- The second is stability. The fold of a monolid means the lid surface is in contact with the skin above it during normal eye movement. That friction is constant. In summer heat, when oil production increases and products soften, that friction pulls liner upward and pushes shadow off the lid entirely.
Before you touch any product, two quick observations about your own eyes will tell you which technique variations apply to you. First, look straight into a mirror with your eyes fully open and note how much lid surface is actually visible between your lash line and the fold. That’s your usable canvas. Second, look at your outer corner and note whether it points slightly upward, sits level, or angles slightly downward. That direction determines how you’ll extend liner and where you’ll concentrate outer corner shadow to read as lifted rather than heavy.
These two observations take thirty seconds. Every technique decision in this article follows from them.
If you also deal with hooded eyes alongside your monolids, the overlap in technique is significant. Our guide to [makeup for hooded eyes] covers the shared placement logic in more detail.
The Formula Stack That Keeps Monolid Eye Makeup from Melting in Summer
Most monolid eye makeup failures in summer aren’t technique failures. They’re formula failures. And they happen before the first stroke of eyeshadow.
Here’s the issue: A monolid has no crease to catch migrating product. On a double-lidded eye, a cream shadow that starts to move in heat will often settle into the crease and stay there, which reads as crease buildup but doesn’t destroy the overall look. On a monolid, that same migrating cream shadow transfers straight up onto the brow bone or presses into the fold and disappears. There’s no crease to stop it.
This is why formula type is the primary durability variable on monolids, and it has to be settled before any technique decision is made.
The formula stack that holds in summer heat is this:
- Start with a lightweight, oil-free eye cream applied sparingly and allowed to absorb fully before any makeup goes on. If you apply a rich moisturizer or eye cream right before primer, the oils in it will work against the primer’s grip. Let it sink in completely.
- Apply an eye primer from the lash line to the brow bone and press it in with your fingertip rather than sweeping it on. Pressing creates better adhesion than sweeping. This step is non-negotiable for monolid eye makeup in summer. It’s the layer that everything else bonds to. Without it, powder shadow becomes patchy within two hours and liner migration starts within one.
- Set the primer with a finely-milled translucent powder before applying any eyeshadow. This creates a dry, consistent surface that powder eyeshadow adheres to more durably than primer alone.
- Use powder eyeshadow as your primary medium in summer, not cream. Powder over primer on a monolid lid is the most stable formula combination for heat and humidity. Cream shadow over primer is more workable but requires a cream specifically formulated for long wear, not a standard cream pot shadow. Standard cream shadows on oily lids in heat will transfer, regardless of primer quality.
- Finish with waterproof liner and waterproof mascara. These aren’t upgrades for summer. They’re the baseline for monolid eye makeup that’s going to last past noon.
One important flag on drugstore powder eyeshadows: pigment concentration varies significantly across price points, and it matters more on monolids than on other eye shapes. A pale, low-pigment drugstore powder on a small visible canvas fades to nearly nothing in summer heat. If you’re building a monolid eye makeup look with drugstore shadows, choose formulas with visible, saturated pigment in the pan. Sheer or buildable formulas require more layering to read at all on this lid surface, and each additional layer increases the risk of transfer.
How to Apply Eyeshadow on Monolid Eyes: The Horizontal Gradient Method
The technique that changes everything for monolid eyeshadow placement is switching from a vertical gradient to a horizontal one.
Most tutorials teach vertical gradient placement: the darkest shade goes closest to the lash line and gradually lightens as you move upward toward the brow. That logic is built for a lid shape where upward blending creates visible dimension.
On a monolid, that same approach buries the darkest, most interesting color under the fold. The lightest, least interesting shade ends up being what actually reads across the visible lid.
Horizontal gradient placement flips this entirely. The outer third of the lid carries the depth. The center lid stays mid-tone or gets a shimmer. The inner corner gets the lightest shade. At eye-open position, the dimension reads across the full visible lid surface because it’s distributed horizontally, not locked into a vertical zone that disappears.
Here’s how to apply it:
Keep your eyes open and look straight ahead into the mirror throughout. Apply a matte transition shade, something warm and neutral, across the outer third of your lid from the lash line upward. Don’t blend past the outer third yet.
Take a deeper matte shade and press it into the outermost corner, building from the lash line upward. Then blend the transition shade inward toward the center lid, softening the edge between the two shades.
The center lid gets a lighter shimmer or stays close to your skin tone. The inner corner gets the lightest shade you’re using. That contrast is what reads as dimension at eye-open position.
For the lower lash line:
Concentrate a thin stripe of the deeper outer corner shade along the outer half of the lower lashes only. This connects the upper and lower eye and extends visible dimension without using any lid space.
Avoid lining the full lower lash line from inner to outer corner. On a monolid, a fully lined lower lash line closes the eye down more aggressively than it does on other eye shapes. Outer half only.
Eyeliner for Monolids: What Works, What Transfers, and the Floating Liner Technique
Eyeliner is where monolid eye makeup either holds together or falls apart completely. The good news is that this eye shape has specific liner advantages that most tutorials don’t mention. The bad news is that the standard liner instructions, including the classic wing technique, need to be modified to work here.
Start at the lash line. Get liner as close to the lash roots as possible. On a monolid, a gap between the liner and the lash line is more visible than on a creased lid because the lash line itself is one of the most visible features of the eye at open position. A thin, precise line tight to the lash roots reads cleaner than a thicker line applied higher up.
Liner thickness matters more on a monolid than on other eye shapes. Thick liner on a small visible canvas consumes the entire lid surface and makes eyes appear smaller. Keep the liner stroke thin at the inner corner and build slightly thicker at the outer corner where you have more room.
For wings: the standard approach of drawing a sharp upward flick from the outer corner doesn’t translate well to monolid anatomy. The outer corner of a monolid typically needs the wing extended outward first, following the natural angle of the lower lash line, before it angles upward. If you angle upward immediately from the corner without extending outward, the wing reads as too sharp against the lid shape and fights the natural direction of the eye.
Formula for summer: waterproof liquid liner or waterproof gel liner outperforms pencil at the lash line on monolids in heat. Pencil formulas, even waterproof ones, soften in summer temperatures and the mechanical friction of the monolid fold accelerates transfer. A waterproof liquid liner with a fine felt tip gives you precision at the lash line and dries to a film that resists friction.
The floating liner technique deserves its own explanation because it’s one of the most effective monolid eye makeup tools available and it rarely shows up in general beauty content. Instead of drawing liner directly at the lash line, you draw it slightly above the fold, in the zone that remains visible at eye-open position. This creates a visible line of definition that sits above where standard liner would disappear. It’s particularly effective with colored liner, since the line reads as a deliberate graphic element rather than as a lash-line definition technique.
For the lower waterline, a nude or white pencil liner opens the inner eye significantly on a monolid. It’s a small step with a disproportionately large effect on how open the eye reads.
If you’re still getting comfortable with how liquid liner handles on the skin, our guide to applying liquid eyeliner in seconds covers the stroke mechanics and drying time tips that make the difference between a clean line and a smudged one.
Mascara for Monolids: Why the Curl Matters More Than the Volume
On most eye shapes, the mascara formula does most of the visible work. On a monolid, the lash curl does. This is the one area where technique investment pays off more than product investment.
Straight lashes on a monolid sit parallel to the lid surface and often disappear into or behind the fold. A curler changes the angle of the lash so it breaks away from the lid plane and becomes visible from the front. The difference between curled and uncurled lashes on a monolid is significantly more dramatic than it is on a double-lidded eye.
The correct curling technique for monolids involves three positions along the lash rather than one clamp at the root. Clamp at the root and hold for ten seconds. Move the curler to the mid-lash position and clamp again. Move it to just below the tips and clamp a third time. This creates a consistent curve along the full length of the lash rather than a sharp bend at the root that can look artificial and loses its shape faster in heat.
After curling, choose a mascara formula that prioritizes length over volume. Lengthening formulas extend the lash past the fold and keep it visible. Volumizing formulas add weight that can pull a curl down by midday, especially in humidity. In summer, a waterproof lengthening mascara on well-curled lashes is the combination that holds.
Apply mascara starting from the outer lashes and working inward, wiggling the wand at the root before pulling through to the tip. The outer lashes carry the most visible work in monolid eye makeup, so they get full attention first.
Mascara transfer onto the upper lid in summer is a specific problem for monolids. The fold brings lash tips close to or in contact with the upper lid surface during eye movement. A waterproof formula dries to a film that resists this contact transfer. A non-waterproof formula, even a long-wear one, will smudge onto the upper lid within a few hours of outdoor heat.
Step-by-Step Monolid Eye Makeup Tutorial for Summer
This tutorial uses the formula stack and placement logic from the sections above. All placement decisions are made at eye-open position. Read through the full sequence before starting so you understand how each step sets up the next one.
Step 1: Prep the lid
Apply a pea-sized amount of oil-free eye cream to the orbital area and let it absorb for at least five minutes. Don’t apply primer over a wet or tacky eye cream. The eye cream softens the skin around the eye; the wait time lets it sink in so it doesn’t interfere with primer adhesion.
Step 2: Apply and set eye primer
Press a thin layer of eye primer from the lash line to just above the brow bone using your fingertip. Don’t sweep it on. Press it in. Then dust a finely-milled translucent powder over the primed lid with a flat eyeshadow brush to set it. The primed and powdered lid is now the base that everything else bonds to.
Step 3: Apply the outer third transition shade
With a mid-sized fluffy brush, apply a matte, warm neutral shadow to the outer third of the lid at eye-open position. Keep your eyes open while placing this shade so you can see exactly where it’s landing on the visible canvas. Don’t blend past the outer third yet. This is the base of your horizontal gradient.
Step 4: Build depth at the outer corner
Using a smaller, denser brush, press a deeper matte shade into the outermost corner of the lid from the lash line upward. Keep eyes open. Build the depth in layers rather than pressing on a heavy amount at once. Once the outer corner depth is established, use the fluffy brush to blend the edge of the transition shade inward toward the center lid. The gradient should read as a clear shift from deeper outer corner to lighter center without a hard line between them.
Step 5: Add shimmer to the center lid and inner corner
Using a flat fingertip or a small flat brush, press a shimmer or metallic eyeshadow onto the center of the visible lid and the inner corner. Pressing rather than sweeping deposits more shimmer pigment and keeps it from being dusted into surrounding areas. At eye-open position, this shimmer should sit in the center of the gradient, creating a dimensional shift between the deeper outer corner and the light inner corner.
Step 6: Apply waterproof liner at the lash line
Using a fine-tip waterproof liquid liner, draw a thin line as close to the lash roots as possible across the upper lash line. Work from the inner corner outward, keeping the line thin at the inner corner and allowing it to build slightly thicker at the outer corner. Hold your eye open with your non-dominant hand if needed to access the lash line without pressing on the lid. Let the liner dry completely before blinking, which takes about thirty seconds with most liquid formulas.
Step 7: Curl the lashes in three positions
With a lash curler, clamp at the lash root and hold for ten seconds. Move to the mid-lash position and clamp again for five seconds. Move to just below the lash tips and clamp for a final five seconds. The curl should be a consistent arc along the full lash length. Don’t rush this step. Curling after liner has dried keeps the liner undisturbed.
Step 8: Apply waterproof mascara
Starting from the outer lashes, place the mascara wand at the root and wiggle it slightly before pulling through to the tip. Work inward across the lash line. The outer lashes carry the most visible work in monolid eye makeup, so they get the most product. Apply a second coat to the outer two-thirds only. Let each coat dry before applying the next to avoid clumping.
Step 9: Apply a nude or white waterline pencil
Line the lower waterline with a nude or white waterproof pencil from inner to outer corner. On a monolid, this step opens the eye perceptibly and creates contrast between the darker lash line above and the lighter waterline below. It’s a small step that reads clearly in photos and in person.
Step 10: Optional floating liner
With a fine-tip liner in black or a contrasting color, draw a fine line above the fold at eye-open position. Look straight ahead into the mirror first to identify exactly where your fold sits when your eyes are open. Draw the floating liner just above that line so it sits in the visible zone at all times. This step is optional for everyday monolid eye makeup but significantly extends the visual impact of the look without adding any product to the lid surface itself.
The Best Drugstore Monolid Eye Makeup Picks for Summer 2026
The product recommendations below have been selected for monolid-specific performance criteria: eye primer adhesion on oily lids, eyeshadow pigment density, waterproof liner hold under friction, and mascara curl retention in heat. Where monolid-specific wear data isn’t available, the gap is noted.
Shade ranges have been checked across fair through very deep skin tones. Any product with limited shade availability is noted in plain language.
Eye Primer
A dedicated eye primer is the single product that makes the biggest performance difference for monolid eye makeup in summer. It’s worth spending here even if you’re keeping everything else at drugstore price.
For a prestige anchor pick, the Urban Decay Eyeshadow Primer Potion has a long and well-documented track record on oily monolid lids specifically. The BuzzFeed community and StyleVana both cite it directly in monolid-specific wear discussions. It comes in Original (translucent) and Eden (light coverage) shades.
Here’s the primer that comes up consistently in monolid-specific wear discussions, and for good reason. It’s available in two shades and holds up in summer heat better than most formulas at this price point.

- BEST EYESHADOW PRIMER: Smooth nude eyelid base primer that prevents creasing, dryness & cracking. Enhances vibrant, long-lasting color for...
- BENEFITS: Vegan primer with polymer tech smooths imperfections, perfect as eyeliner or eyeshadow base. Ideal for oily lids & crepey skin, ensures...
Last update on 2026-07-13 / Affiliate links / Images from Amazon Product Advertising API
(As an Amazon Associate, we earn from qualifying purchases.)
For a drugstore pick, the NYX Professional Makeup Eye Shadow Base is the most frequently recommended alternative across K-beauty and Asian beauty editorial sources. It’s available in three shades. Note: independent monolid-specific summer wear testing data for the NYX base is limited. It performs well in general wear reviews but hasn’t been widely documented under humidity and heat conditions specifically for this eye shape.
If you want to keep the full routine at drugstore pricing, this is the primer to reach for. Just allow more dry time before applying shadow than you’d need with the prestige version.
No products found.
(As an Amazon Associate, we earn from qualifying purchases.)
Eyeshadow
For monolid eye makeup, prioritize eyeshadow palettes with visibly saturated, pigment-dense powder formulas. Sheer or diffused powder formulas require heavy layering to read on a smaller visible canvas and increase transfer risk with each additional layer.
The palette you choose matters more on a monolid than on most eye shapes. Because your visible canvas is smaller, a low-pigment formula fades before noon even with primer underneath it. This palette has the matte depth shades you need for the outer corner gradient and a shimmer option for the center lid that actually reads at eye-open position.
No products found.
(As an Amazon Associate, we earn from qualifying purchases.)
Waterproof Liner
For the lash line, a fine-tip waterproof liquid liner is the most durable formula choice for monolid eye makeup in summer. Gel liner in a pot with an angled brush is a strong second option, especially for building a slightly thicker line at the outer corner.
On a monolid, your liner formula is doing more work than the application technique. The fold creates constant friction against the lash line during eye movement, and a formula that doesn’t dry to a true film will transfer upward onto the lid surface by midday. This liner has the fine brush tip and pigment density that monolid lash line application requires.

- Waterproof Matte Liquid Eyeliner: Get the perfect long lasting cat eye look with NYX Professional Makeup Epic Ink eyeliner, with a matte black...
- Precise Tip: Our ultra precise tip is flexible and Easy to Use; Every stroke is unbelievably fluid for a defined finish; Control the thickness of...
Last update on 2026-07-13 / Affiliate links / Images from Amazon Product Advertising API
(As an Amazon Associate, we earn from qualifying purchases.)
Waterproof Mascara
Choose a waterproof formula with a lengthening brush rather than a volumizing paddle brush. Length extends the lash past the monolid fold and stays visible. Volume adds weight that can pull curled lashes back toward the lid surface by midday in heat.
Most waterproof mascaras resist water. Fewer of them actually hold a curl through a full day of heat and sebum. This one uses a Shape-Memory Polymer that locks the curl angle from the moment you apply it, which is the specific performance variable that matters most for monolid lashes that tend to sit flat against the lid surface.
No products found.
(As an Amazon Associate, we earn from qualifying purchases.)
The Monolid Makeup Looks That Summer Was Made For
The smooth, uninterrupted lid surface of a monolid is an advantage in techniques where a clean, unbroken canvas matters. These three looks perform better on monolids than on most other eye shapes.
Floating liner
The precision required for a clean floating liner line is easier to achieve on a monolid than on a creased lid because there’s no fold creating an irregular surface above the lash line. A clean floating line in black, brown, or a bold color reads as a deliberate graphic element rather than a liner workaround. It’s one of the cleaner liner techniques available in monolid eye makeup and it’s been driving significant engagement in the #monolidmakeup TikTok community throughout 2025 and into 2026.
Aegyo sal lower lash line
The K-beauty aegyo sal technique, which creates a soft, puffy under-eye effect using light shimmer along the lower lash line, looks particularly natural on monolid eye shapes. The smooth lid paired with a subtly highlighted lower lash line creates a rounded, open-eyed effect that’s become one of the signature looks in K-beauty and J-beauty monolid eye makeup content.
Color block and graphic liner
A solid block of a single saturated color across the visible lid reads with more clarity on a monolid than on a double-lidded eye, because there’s no crease line interrupting the field of color. Graphic liner techniques that use negative space or geometric shapes are similarly clean on this lid shape. The uninterrupted surface does the work that a complex blend would do on other eye shapes.
Monolid Eye Makeup Mistakes to Stop Making This Summer
Applying shadow with your eyes closed and expecting it to land in the right place. On a monolid, the visible zone shifts when your eyes open. Shadow applied at eye-closed position almost always lands in a zone that partially or fully disappears. Apply with eyes open from step one.
Skipping eye primer because you’re in a hurry. There’s no shortcut that compensates for missing this step on a monolid in summer heat. A five-minute wait for primer to set saves you from redoing your entire eye look at noon.
Using cream shadow on a bare lid in summer. Cream directly on skin, with no primer underneath, on an eye shape that creates lid-on-lid friction in heat is the fastest route to complete makeup transfer. If you prefer cream formulas, apply them over a set primer base and choose a specifically long-wear cream formula rather than a standard cream pot shadow.
Drawing a sharp upward wing without extending outward first. On most monolid eye shapes, a wing that angles immediately upward from the corner reads as too steep against the lid shape. Extend the wing outward first along the angle of your lower lash line, then lift the tip. This creates a wing that follows your eye shape rather than fighting it.
Relying on mascara volume without curling the lashes first. Volume adds weight. On a monolid where uncurled lashes sit parallel to the lid surface, adding weight without curl first pushes lashes further down, not outward. Curl before mascara, every time.
Lining the full lower lash line from inner to outer corner. A fully lined lower lash line closes a monolid down more aggressively than it does on other eye shapes. Keep lower lash liner or shadow to the outer half only and reserve the inner waterline for a nude or white pencil.
Assuming low-pigment shadow will build up to full color on a small canvas. It won’t in summer heat. Start with a shadow that reads as fully saturated in the pan. Sheer and buildable formulas require more layers, and more layers mean more transfer risk on a monolid lid.
Conclusion
Monolid eye makeup that lasts through a full summer day isn’t about working around your eye shape. It’s about learning the technique system that’s actually built for it. The right formula stack, starting with eye primer and finishing with waterproof everything, removes the durability variables that summer heat exploits. Horizontal gradient placement keeps your shadow visible at eye-open position. The floating liner, the aegyo sal, the graphic color block — these are the looks monolid eyes do at their best, and they’re worth knowing.
The mainstream tutorial system wasn’t built for this eye shape. That’s its limitation, not yours.
FAQ
Why does my eyeshadow disappear when I open my eyes?
This is the most common frustration in monolid eye makeup, and it has a direct cause. When you apply eyeshadow with your eyes closed and follow standard placement instructions, you’re placing product in a zone that becomes hidden under the fold once your eyes open. The solution is to keep your eyes open throughout shadow application and place product based on what’s visible at eye-open position, not eye-closed position. Horizontal gradient placement, with depth at the outer third and light at the inner corner, keeps dimension readable across the visible lid surface.
What’s the best eyeliner for monolids in summer?
A waterproof liquid liner with a fine felt tip is the most durable choice for monolid eye makeup in summer. It dries to a film that resists the mechanical friction of the lid fold during eye movement. Pencil liners, even waterproof versions, soften in summer heat and transfer more readily under that friction. If you prefer a gel formula, apply it with an angled brush and allow full drying time before blinking.
Do I need an eye primer if I already have oily eyelids?
Yes, and more urgently than someone without oily lids. Oil is what breaks down the bond between eyeshadow and skin. On a monolid where there’s no crease to contain migrating product, oil-accelerated breakdown means complete transfer rather than crease buildup. An oil-absorbing eye primer creates a dry, grippable base that counteracts the oil before it reaches your eyeshadow. It’s the step that changes how long your monolid eye makeup actually lasts.
How do I make my eyes look bigger with monolid eye makeup?
Three techniques do the most visible work on monolid eye shapes. A nude or white waterproof pencil on the lower waterline opens the inner eye immediately. A shimmer or metallic shade pressed onto the center of the visible lid and the inner corner creates a light-reflecting zone that reads as dimension. Curling the lashes fully before mascara application lifts them away from the lid surface and breaks the lid line, making the eye appear more open from the front. These three steps together accomplish more than any single product claim about eye-opening effects.
Can I do a smoky eye on monolids?
Yes, with a placement adjustment. A standard smoky eye blends dark shadow heavily across the full lid, which on a monolid creates a heavy, closed-down look rather than a smoky one. For monolid eye makeup, keep the darkest shade concentrated at the outer corner and outer lash line, blend it horizontally along the lower lash line, and keep the center lid lighter. The result reads as smoky dimension at eye-open position because the contrast between the dark outer corner and lighter center lid is visible across the horizontal axis. A full-lid application of dark shadow tends to disappear under the fold and read as a heavy, undefined look rather than a deliberate smoky eye.
The Monolid Makeup Debate
Why did you vote that way? Drop your take in the comments.