Dying to try out an eyebrow slit, but aren’t ready to commit to shaving it? Fortunately, there is a way to get a temporary slit. Drop that eyebrow shaver!
If you’re over feathery brows, check out how to cop temporary eyebrow cuts.
RELATED: Eyebrow Tutorial | Finding The Right Brow Shape For Your Face
The Shave-Free Eyebrow Slit Tutorial You’ve Been Searching For
What You’ll Need:
- Coloressence gel eyeliner (or your favorite eyebrow makeup)
- L.A. Girl Pro.Conceal HD High Definition Concealer
- Rude Cosmetics Stop the Pressed(ed) Powder
How to Create an Eyebrow Slit:
- Do your eyebrow makeup as your normally would. In this tutorial, we’re actually using a gel eyeliner from Coloressence. But feel free to you use whatever product you usually use.
- Start out by tracing the border of your brows. Then once you’re happy with the shape, fill it in from the tail end towards the middle. When you get to the inner corner of your eyebrows, draw vertical lines from bottom to top. This will help create the illusion of eyebrow strands. It will also help you prevent drawing too solid or too harsh brows. Brows are naturally more sparse towards the center.
- Grab your concealer and draw a thin vertical line down the arch of your brows with a thin eyeshadow brush. Press this onto your brows instead of brushing them on. This way, you won’t mess with your perfect brows. Once you’re happy with the thickness of your eyebrow slit, move on. Don’t worry if the hairs are still visible, we’ll go over this later on.
- Paint the perimeter of your brows with the same concealer. Apply your concealer between your brows, underneath, above, and on the sides of your brows. Create a border around your eyebrows, careful not to mess with your eyebrow makeup. Avoid the inner corner of your brows since this will create a harsh line. This will also clean up the visible stray hairs, giving you perfectly crafted brows. The goal of this step is to perfect the shape of your brows and to blend the color of the eyebrow cuts with the surrounding area.
- Using your foundation brush or fingers, blend the concealer around your eyebrows. Keep blending until it melts with your foundation.
- Go back with your eyeshadow brush and your usual concealer. Using your eyeshadow brush, paint on the concealer along the border of your brows. Again, skip adding concealer on the inner corner of your brows. In step 4, we painted all over the brown bone and the surrounding area. This time, we’re just focusing on the edges of the brows.
- Blend out the concealer with your fingers, pressing the concealer onto your skin. Tugging on your skin might ruin your foundation and concealer makeup.
- If you got some concealer on your brow strands or unintentionally thinned out your brows, you can go back to your eyebrow makeup and fill your brows.
- Draw vertical lines on either side of your eyebrow cuts. This will help define the eyebrow slit especially if it somehow got lost in the process.
- Add a second layer of concealer on your eyebrow slit. This time, it should completely color your brow strands where the slit is. Press the concealer into your brows with the same eyeshadow brush until you’re happy with its color and shape.
- Extend the concealer past the border of your brows to make sure you really paint on a gap on your brows. Apply concealer on both the left and right sides of your eyebrow slit, above and below the brows. It should look like a sidewards H, the connecting line being the eyebrow slit.
- Blend the concealer on the borders of your brows.
- Reach for your pressed powder. In this tutorial, we’re using the Rude Cosmetics Stop the Press(ed) Powder. Using the same eyeshadow brush you used for your concealer, tap on some concealer on top of your eyebrow slit. This will seal your concealer and keep the liquid concealer from budging on your brow strands.
- If you want an eyebrow slit on both brows, you can move on to your next brow using the first one as a guide. If we’re just going with one slit, you’re finished!
RELATED: Eyebrow Threading | How To Thread Your Eyebrows
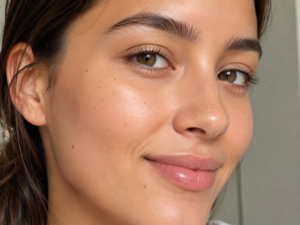
Finished Look:
Eyebrow makeup is a transformative tool in our makeup arsenal. Feathery brows give us ethereal and romantic vibes, while perfectly arched brows give us classic and polished looks. But when these looks just aren’t cutting anymore, it’s time for something different.
The eyebrow slit is a bit of a tricky look, so expect that this will take some trial and error. The thickness and angle of your slit and how many slits you have depend 100% on your preference. The more eyebrow cuts you have, the more edgy your look is. But limiting your eyebrow slit to just one is enough to give you that umph to completely change up your look.
With the layers of concealer we applied in this tutorial, I recommend finishing off with a great fixing and setting spray. A fixing spray will help your layers of makeup melt and blend together. A setting spray will keep your makeup in place throughout the day, preventing your complexion makeup from looking cakey.
This eyebrow cut makeup look is extra edgy and this tutorial makes it accessible to everybody! If you adore your prim and proper aesthetic but dare to go a bit bolder sometimes, then this was made for you.
Treat this as a gateway experiment to different eyebrow looks. Once you’ve mastered the confidence and the skills, grab your shaver and scissors and kill that eyebrow slit. Or use this as a look you can leave and come back to any time you want.
This super easy tutorial won’t raise brows – just your confidence. You’re welcome! Go rock that eyebrow slit.
Excited to create your own faux eyebrow slit? Have you already graduated to shaven eyebrow cuts? Share your eyebrow journey with us in the comments section below! We’d love to hear from you.
Up Next:
- 18 Best Celebrity Eyebrows That Won The On-Fleek Crown
- Eyebrow Stamp Makeup Trend | 5 Things You Should Know About
- 11 Everyday Natural Makeup Tutorials [Updated 2020]
We aim to feature the best of the best in the makeup world, and maybe that can include you! WRITE for us!
Follow us on Facebook, Twitter, Instagram, and Pinterest for the latest makeup, hair, and nail trends. Don’t forget to subscribe to our Youtube Channel for cool makeup tutorials.