If you love all the glossy eyes you’ve been seeing on the editorial spreads, then you NEED to read this tutorial! So what if you’re stuck at home, who says you have to go out to put on a stunning makeup? Besides, this look will look amazing on Instagram or TikTok!
Now, what are you waiting for? Go check out the tutorial below. Read until the end because Makeup Tutorials will also teach you tips and tricks to make your glossy lids last longer!
RELATED: How To Do Deep Crease- Eyeshadow Tutorial
Instagram-Worthy All Day Glossy Eyes Tutorial
Products You’ll Need to Achieve the Glossy Eyes Makeup Look

- Face Primer – Hourglass Veil Mineral Primer
- Foundation – Mac Face & Body
- or Tinted Moisturizer – Laura Mercier Tinted Moisturizer Broad Spectrum
- Undereye Corrector – Becca Under Eye Brightening Corrector
- Eyebrow kit or pencil – NYX Micro Brow Pencil
- Eyeshadow primer – Too Faced Shadow Insurance
- Eyeshadow palette – Lorac
- Waterproof Eyeliner – Smashbox Always On Gel Liner in shade Fishnet
- Face Gloss – Flesh Beauty Fleshpot Eye and Cheek Gloss
- Eyelash curler – Shu Uemura Eyelash Curler
- Black mascara – Heroine Make Long & Curl Advanced Film Mascara
- Contour, highlight and blush palette – Dior Backstage Glow Face Palette
- Nude Lipstick – Mac Velvet Teddy
- Lip Gloss – Fenty Gloss Bomb Universal Lip Luminizer
Step 1: Apply Primer and Foundation
[instagram url=https://www.instagram.com/p/B-FhmrTFstj/hidecaption=true width=800]
Apply a face primer to get an even canvass.
Leave it for a few minutes until it dries out completely. Next, apply your chosen foundation. I prefer a sheer foundation for this look like the cult favorite Mac Face and Body. I love this because it’s not only sheer it’s also long-wearing and most of all water-resistant.
Whichever foundation you prefer to use, make sure to even out your skin tone from face to neck.
Step 2: Apply Concealer or Corrector Under the Eyes

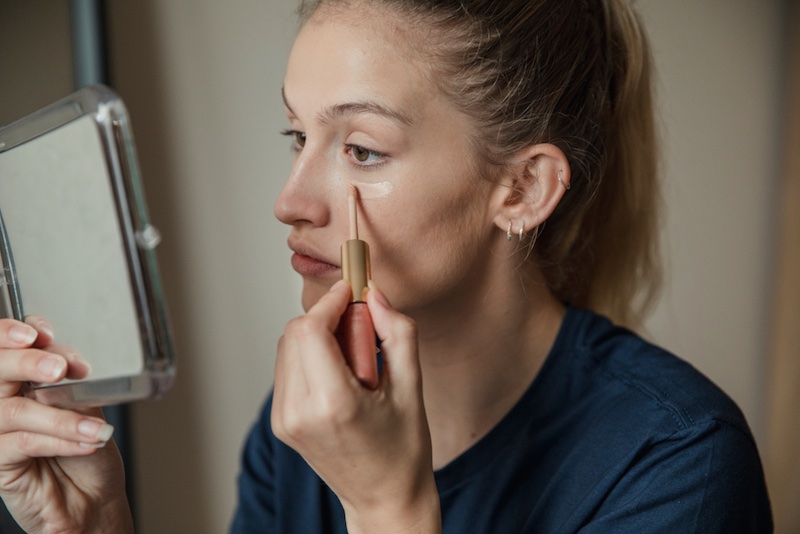
While it’s better to keep your overall face makeup natural, for this look, it’s important to apply a concealer or under eye corrector because the emphasis of the look is on your eyes.
To make sure your under-eye concealer will not crease, apply a setting powder.
Step 3: Fill in Brows

We’ve said this over and over again, you need to groom your brows before you put on any eye makeup.
Tip: If you have light hair go 2 shades darker, but if you have dark hair go 2 shades lighter.
Step 4: Prep Your Lids
This is the most important step for your glossy eyes makeup look.
Prime your eyes to help the eye makeup last long. Additionally, the primer will help with color saturation.
The tricky part about the glossy lids is actually keeping the gloss on the lid. The gloss has a tendency to move around on the skin.
First, pat your lids with a facial tissue or an oil blotting sheet to remove any excess oil.
Then, squeeze a small amount of product at the back of your hand and apply the primer with a concealer brush. You can also use your fingertips but with the health crisis we’re facing, it’s better to be safe than sorry.
Whatever your choice is, make sure your lids are evenly covered.
Step 5: Add Nude Eyeshadow to Your Crease
|
Choose an eyeshadow shade that closely matches the color of your lids. Use a fluffy eyeshadow brush and apply it to the crease of your eyes.
In this step, you want to keep the nude eyeshadow just on your crease. Also, this step will help make the color pop or more vibrant.
Step 6: Choose Your Eyeshadow Color and Dab It on Your Lids
[instagram url=https://www.instagram.com/p/B-hc2pHp39-/ hidecaption=true width=800]
There’s no specific color for this glossy eyes look, you can use virtually any eyeshadow shade, but take note that a highly pigmented color will look amazing like blue, green, and pink.
Once you’ve settled on a color, use a denser eyeshadow brush and apply the shadow on your lids. You want to get a lot of color payoff, so lightly dab the powder on your lids with the brush.
When you dab the powder on your lids, you’re simply transferring the product from your brush to your skin. If you apply it with a sweeping motion, you won’t have as much color payoff because you’ll blend the eyeshadow.
Tip: Stay away from glittery eyeshadows because adding gloss to glitter can make it clumpy. Instead, opt for creamy eyeshadows or eyeshadows with light shimmers.
RELATED: Cut Crease Sapphire Eyes Makeup Tutorial [Step By Step Tutorial]
Step 7: Sweep Some Eyeshadow on Your Lower Lids
Don’t forget to add eyeshadow on your lower lids. For a more precise application, switch out your brush to a smaller eyeshadow brush.
Take your brush and sweep some of the same eyeshadow along your lower lashline.
Step 8: Line Your Waterline
|
If you’re looking to add a little more drama to your look, you can line your waterline with a waterproof black pencil eyeliner. Glossy eyes can look imprecise, so using eyeliner is also a great way to add a layer of definition to the overall look.
Step 9: Get Glossy Eyes
[instagram url=https://www.instagram.com/p/B-frO8rno4i/ hidecaption=true width=800]
Now, the fun part! You actually have a few options when it comes to glossing your lids. You can use face gloss, cheek gloss, or, if you’re desperate, you can even use some Aquaphor.
Just make sure to stay away from gloss formulated just for the lips. Lip gloss works great on your lips, but they’re too sticky for the eyes. However, there are waterproof clear lip glosses available in the market, that I can recommend.
Use a flat synthetic brush to apply the product on your lids. Try to avoid getting too close to the lash line. Even if you added primer, there’s a chance that the gloss will move around and get to your eyes at some point during the day.
Instead, use small patting motions and apply it over your pigmented eyeshadow. Apply the gloss until you hit the crease of your eye where the second layer of eyeshadow should end.
Tip: Make sure to use a synthetic brush when applying the gloss. While natural fiber brushes are good for picking up powder products, synthetic fiber brushes are better on cream or liquid products.
Step 10: Apply Mascara but Do Not Curl Your Lashes
|
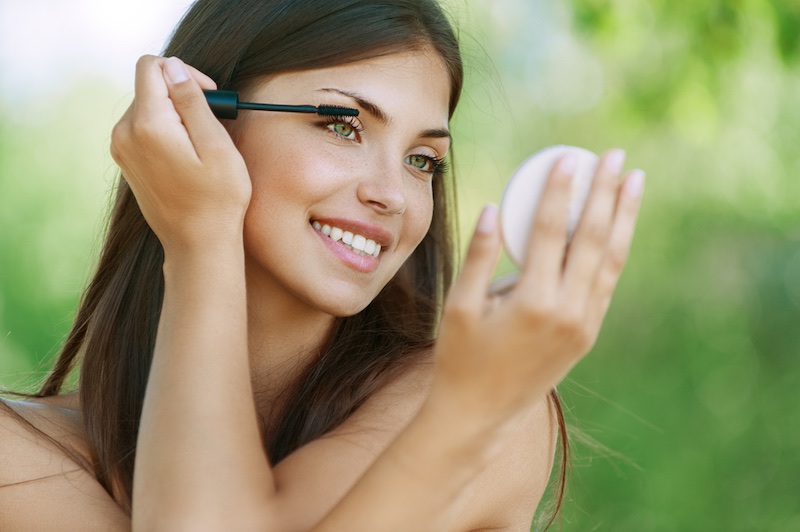
Finish your eyes with your favorite black mascara. Don’t forget to apply some on your lower lashes as well.
Tip: DO NOT curl your lashes! This will ruin your entire makeup. You need the mascara just to open up your eyes.
Step 11: Do the Rest of Your Makeup
The glossy eyes makeup is just one part of the allover gloss look. On the runway, we’re seeing gloss all over the models’ faces.
So if you want to try the entire allover gloss look, you can add some of the gloss on your cheekbones, nose bridge, and over your lipstick. It may be hard to maintain the allover gloss look all day though, good thing we are all just staying at home!
If all you want to try out are glossy lids, you can opt to go au naturale with your face makeup. Instead, complement your bold, glossy lids with your favorite nude lipstick and a subtle swipe of light blush.
You Need to Know This:

Remember we said we’re giving away tips and tricks to make your glossy eyes last long? Here it goes…
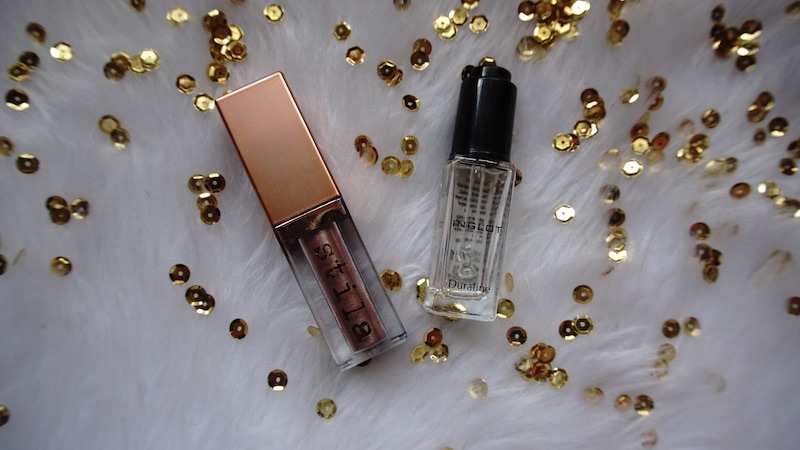
- Instead of a powder eye shadow, opt for a waterproof liquid eyeshadow like the Stila Liquid Eyeshadow. We highly recommend either the Shimmer and Glow variant or the Suede Shade. Just don’t get the Glitter & Glow for the same reason we said about the glitter powder shadows.
- This one’s normally a professional makeup artist’s arsenal, but it’s commercially available for everyone. Inglot Duraline, this famous clear gel-like product has many uses but the most important of all is its ability to make makeup last long and level up the intensity of the makeup pigment you’re using.
So how will you use these products, you ask?
- Simple, after you apply your eye primer, dab the waterproof liquid eyeshadow on your eyes and let it dry. Then, with a very light hand apply the Inglot Duraline on top. Lastly, apply the gloss.
Note: If you don’t own a waterproof liquid eyeshadow, you don’t have to buy one because your powder eyeshadow will do. The Inglot Duraline will do the trick of making it last longer.
Most makeup divas can pull off either the classic matte or sparkly eyeshadow look but going glossy with your eyes takes it to a whole other level! Even if you opt for a neutral eyeshadow, gloss can totally make it come alive.
A gloss doesn’t just give out a unique finish, but it also intensifies the eyeshadow pigment. With this tutorial, you’re ready to impress your crew with this fun runway trend.
Will you ever try the glossy eyes trend? What eyeshadow color will you use? Share your answers in the comment section below. Or better yet, tag us on Instagram!
UP NEXT:
- 2020 Skincare Trends: 7 Biggest Beauty Innovations To Watch Out For
- 15 Beauty Products For Spring Break | Makeup Tutorials Recommended
- How to Fix Broken Makeup
We aim to feature the best of the best in the makeup world, and maybe that can include you! CONTRIBUTE to us!
Follow us on Facebook, Twitter, Instagram, and Pinterest for the latest makeup, hair and nail trends. Don’t forget to subscribe to our Youtube Channel for cool makeup tutorials.
Leave a Reply